


Logiline| Logistic CRM system - How to edit the price list?
In order to make changes to the price list, select the necessary record in the table and click the ![]() button (Figure 1, Pointer 1).
button (Figure 1, Pointer 1).
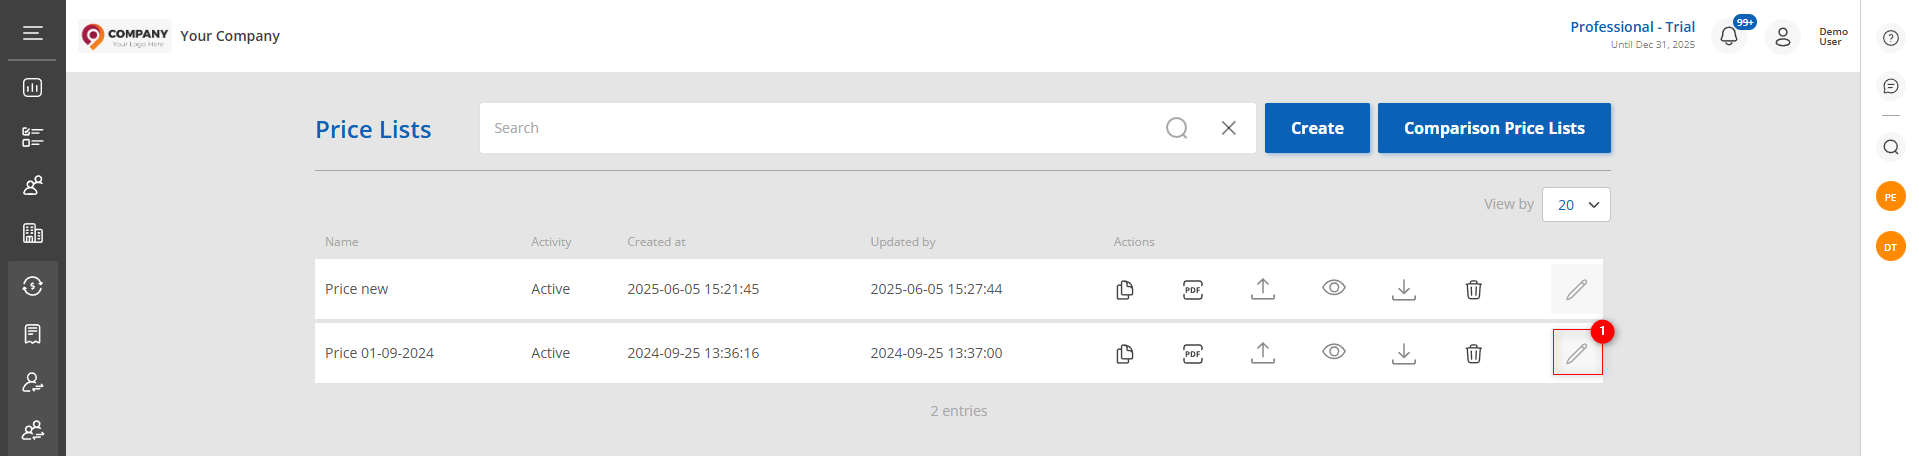 Figure 1 - Price lists page
After that the site page "Edit price list" will open, in which fill in the fields (Figure 2):
-
"Title" - enter the price list title;
-
"Activity" - select the activity status from the drop-down list that opens when you click on the
 button.
Note: If you select the activity status "Inactive", the corresponding price list will not be available for use in calculations in Delivery Calculator.
"Warehouses" tab
To add a new warehouse for loading, click “Add” (Figure 2, Pointer 1). A detailed description of the steps to create a warehouse is given on the “Warehouses” page.

Figure 2 - Edit price list page
Tab "Copart"/"IAAI"/Manheim/Adesa
To add shipping costs from the auctions location to the warehouse where loading will take place, select one of the following methods:
To add one or more locations, click on the "Add" button (Figure 3, Pointer 1). This will add a row (Figure 3, Pointer 2) in which fill in the field:
-
“State” - select the state from the drop-down list that opens when you click on the
 button;
 -
“Location, from” - select the city where the auction site is located from the drop-down list that opens when you click on the
 button;
 -
“Warehouse - loading port” - from the drop-down list that opens when you click on the
 button , select the warehouse to which the delivery will be made;
 -
using keyboard input, enter the cost of delivery in the appropriate field by vehicle type (Figure 3, Pointer 3);
-
“Status” - click on the button "On" to activate the location, in case of canceling the button - "Off".
To create multiple locations, add the required number of rows and repeat the process of filling in the fields (described above).
 Figure 3 - Copart tab. Adding one or more locations
To add locations in bulk, click on the "Fill locations" button (Figure 3, Pointer 4).
To delete unfilled locations, click on the "Delete unfilled" button (Figure 3, Pointer 5). As a result, only those locations with filled fields will be displayed in the list.
Note: The mandatory fields are "State", "Location", "Warehouse, port of shipment" and the indicated value, for the first vehicle type (Figure 3, Pointer 3).
If you want to delete a line, click on the ![]() button (Figure 3, Pointer 7). After that a window will open, in which to confirm the deletion of location click on the "Delete" button, to cancel the button - "Cancel" (Figure 4).
button (Figure 3, Pointer 7). After that a window will open, in which to confirm the deletion of location click on the "Delete" button, to cancel the button - "Cancel" (Figure 4).
To activate all locations, click on the "Activate all locations" button (Figure 3, Pointer 6). After that a window will open, in which to confirm the activation of all locations click on the "Activate" button, to cancel the button - "Cancel" (Figure 5).
After adding locations using any of the methods, click the button ![]() to save the data, and the created location will be displayed on the tab.
to save the data, and the created location will be displayed on the tab.
 Figure 4 - Confirmation/cancellation of location deletion
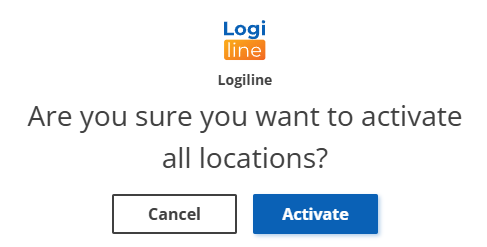
Figure 5 - Confirming/disconfirming activation of all locations
"Destination Ports" tab
When creating a price list, the ports that are created on the site on the “Settings” page are automatically filled in. To add a new port, click on the “Add” button (Figure 6, Pointer 1). After that the “Destination Port” window will open, a detailed description of the steps to create a warehouse is given on the “Destination Ports” page.
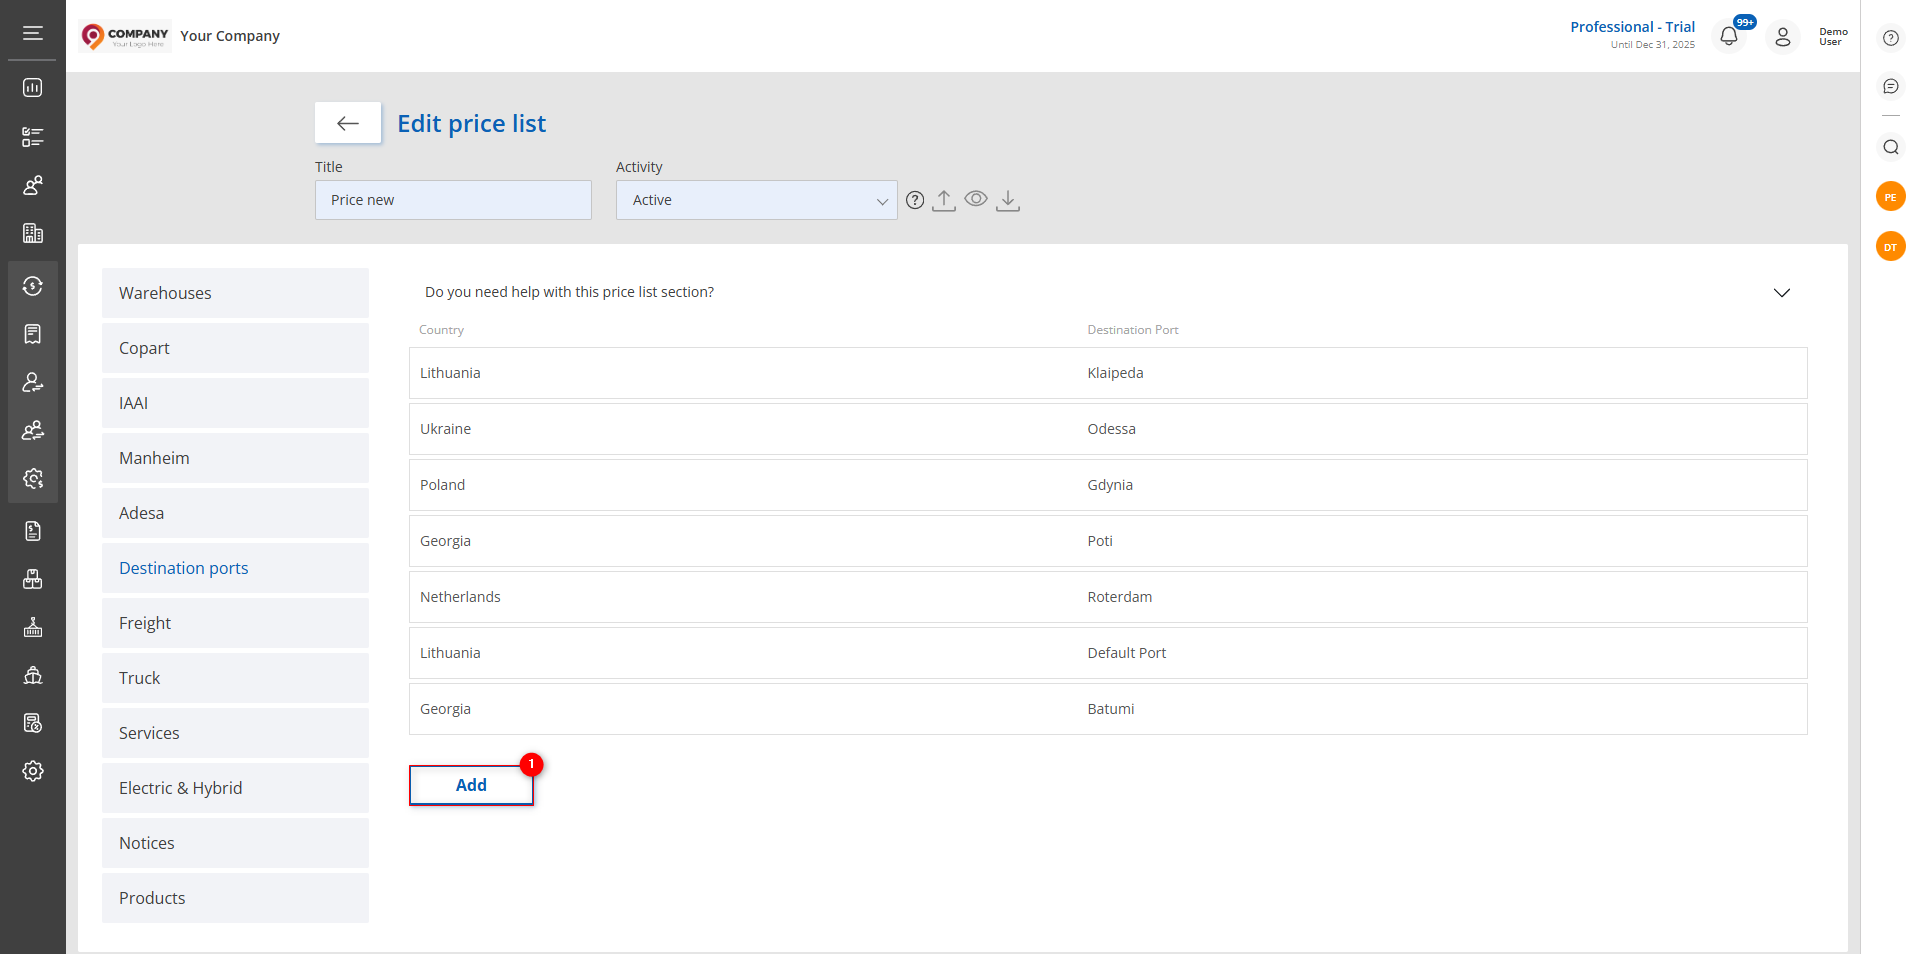 Figure 6 - "Destination Ports" tab
"Freight" tab
To change the cost of delivery to the port of destination by sea, click the ![]() button and make the necessary changes in the fields that open.
button and make the necessary changes in the fields that open.
To add freight, click the “Add” button (Figure 7, Pointer 1). This will add a new row (Figure,Pointer 2), in which fill in the fields:
-
“Warehouse - Loading Pot” - from the drop-down list that opens when you click on the
 button , select the warehouse from which the shipment is to be made;
-
“Destination Port” - from the drop-down list that opens when you click on the
 button, select the port to which you want to send;
 -
using the keypad enter the cost of sea delivery in the appropriate field by vehicle type (Figure 7, Pointer 3);
-
"Status" - click the "On" button to activate the freight, in case of cancellation the "Off" button.
To save the data, click on the button ![]() and the created freight/freights will be displayed on the tab.
and the created freight/freights will be displayed on the tab.
To create multiple freights, add the required number of rows and repeat the process of filling in the fields (described above).
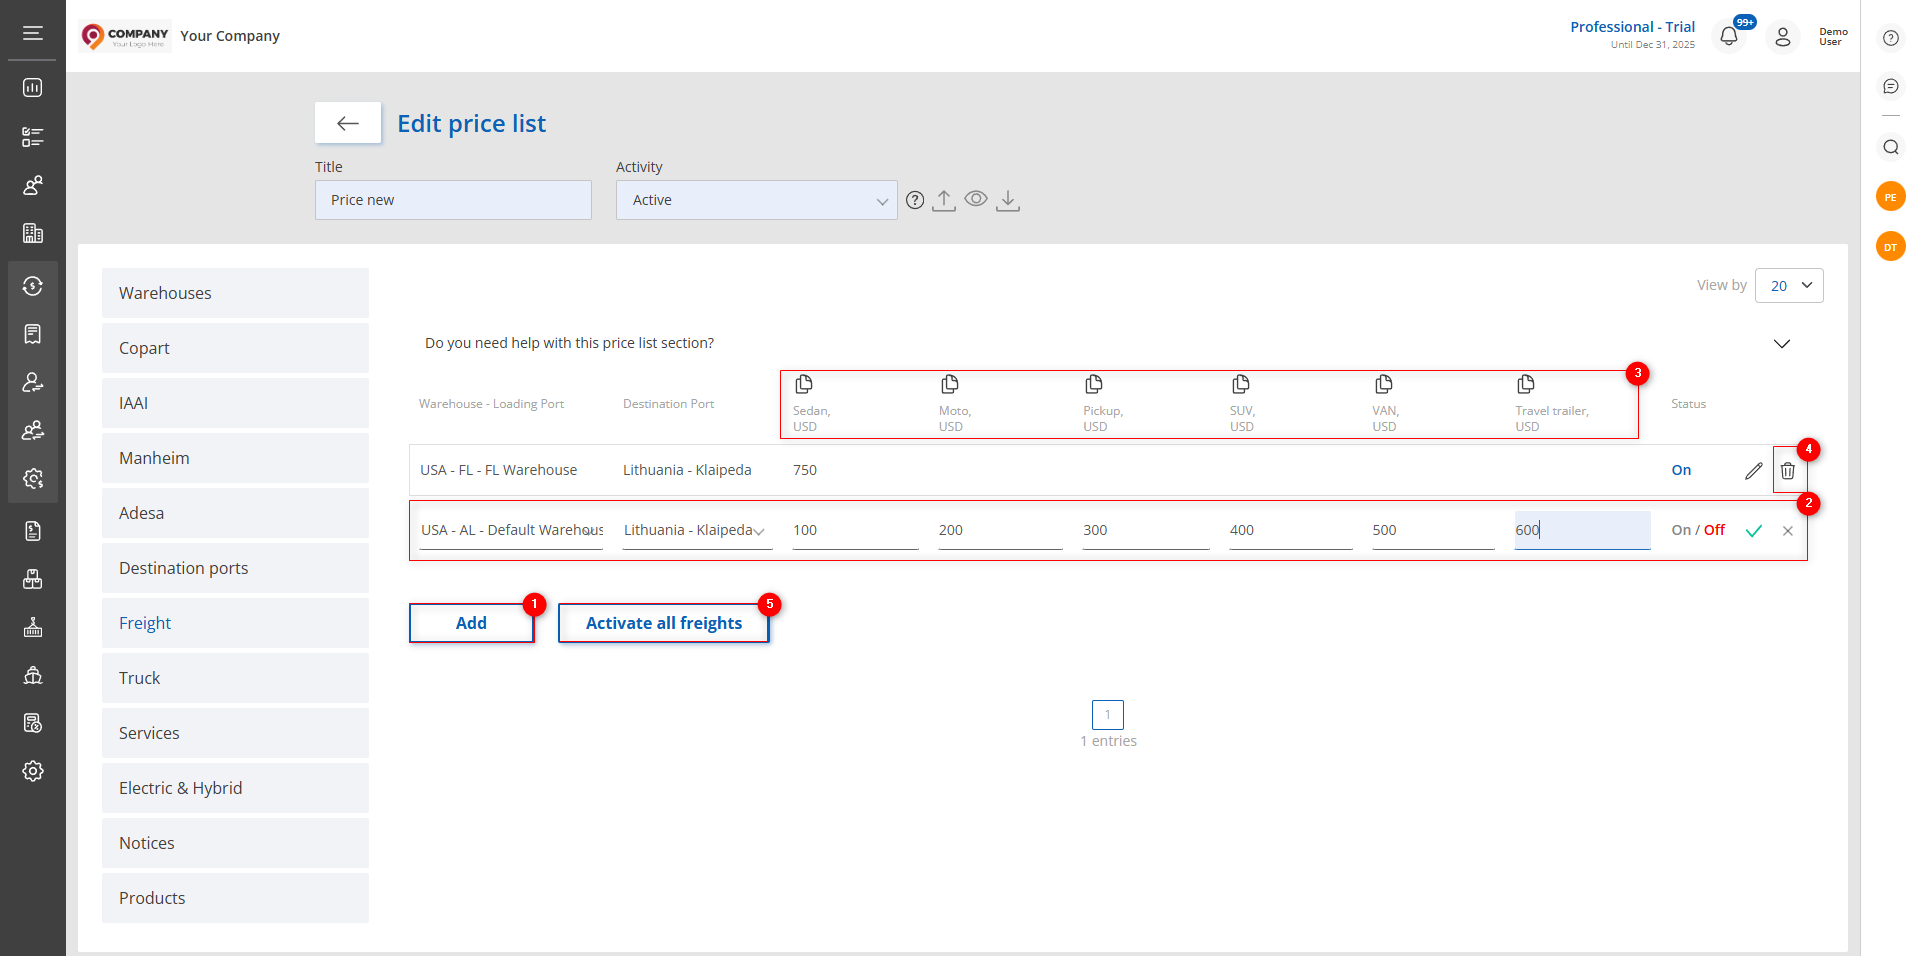 Figure 7 - "Freight" tab
If you need to delete a line, click on the ![]() button (Figure 7,Pointer 4). In the window that opens, confirm the deletion with the “Delete” button or click “Cancel” (Figure 8).
button (Figure 7,Pointer 4). In the window that opens, confirm the deletion with the “Delete” button or click “Cancel” (Figure 8).
 Figure 8 - Confirmation/cancellation of freight deletion
To activate all freights, click on the "Activate all freights" button (Figure 7, Pointer 5). After that a window will open, where to confirm the activation click on the "Activate" button, to cancel the activation click on the "Cancel" button (Figure 9).
 Figure 9 - Confirmation/cancellation of activation of all freights
"Truck" tab
To change the cost of shipping to a destination overland, click on the ![]() button and make the necessary changes in the fields that open.
button and make the necessary changes in the fields that open.
To add a shipping cost to an overland destination, select one of the methods:
-
Click on the "Add" button (Figure 10, Pointer 1). This will add a row (Figure 10, Pointer 2) in which you fill in the fields:
-
"Country From" - from the drop-down list that opens when you click on the
 button , select the country from which you want to send;
 -
“Destination Country” - from the drop-down list that opens when you click on the
 button, select the country to which the shipment is to be sent;
 -
“Destination City” - enter the name of the city to which the shipment is being sent;
-
using keyboard input enter the overland delivery cost in the appropriate field by vehicle type (Figure 10, Pointer 4);
-
"Status" - press the "On" button to activate the car transporter, in case of cancelation the "Off" button.
-
Click on the "Fill all Ports" button (Figure 10, Pointer 3). As a result, the data in the "Country From" fields will be filled in automatically based on the "Destination Port" fields, which are filled in the "Freight" tab. The number of filled lines on the "Truck" tab will be similar to the number of filled lines on the "Freight" tab.
After that, fill in the rest of the fields similarly to the first step.
To save the data, click the ![]() button (Figure 10, Pointer 5). As a result, the created truck/cars will be displayed on the tab.
button (Figure 10, Pointer 5). As a result, the created truck/cars will be displayed on the tab.
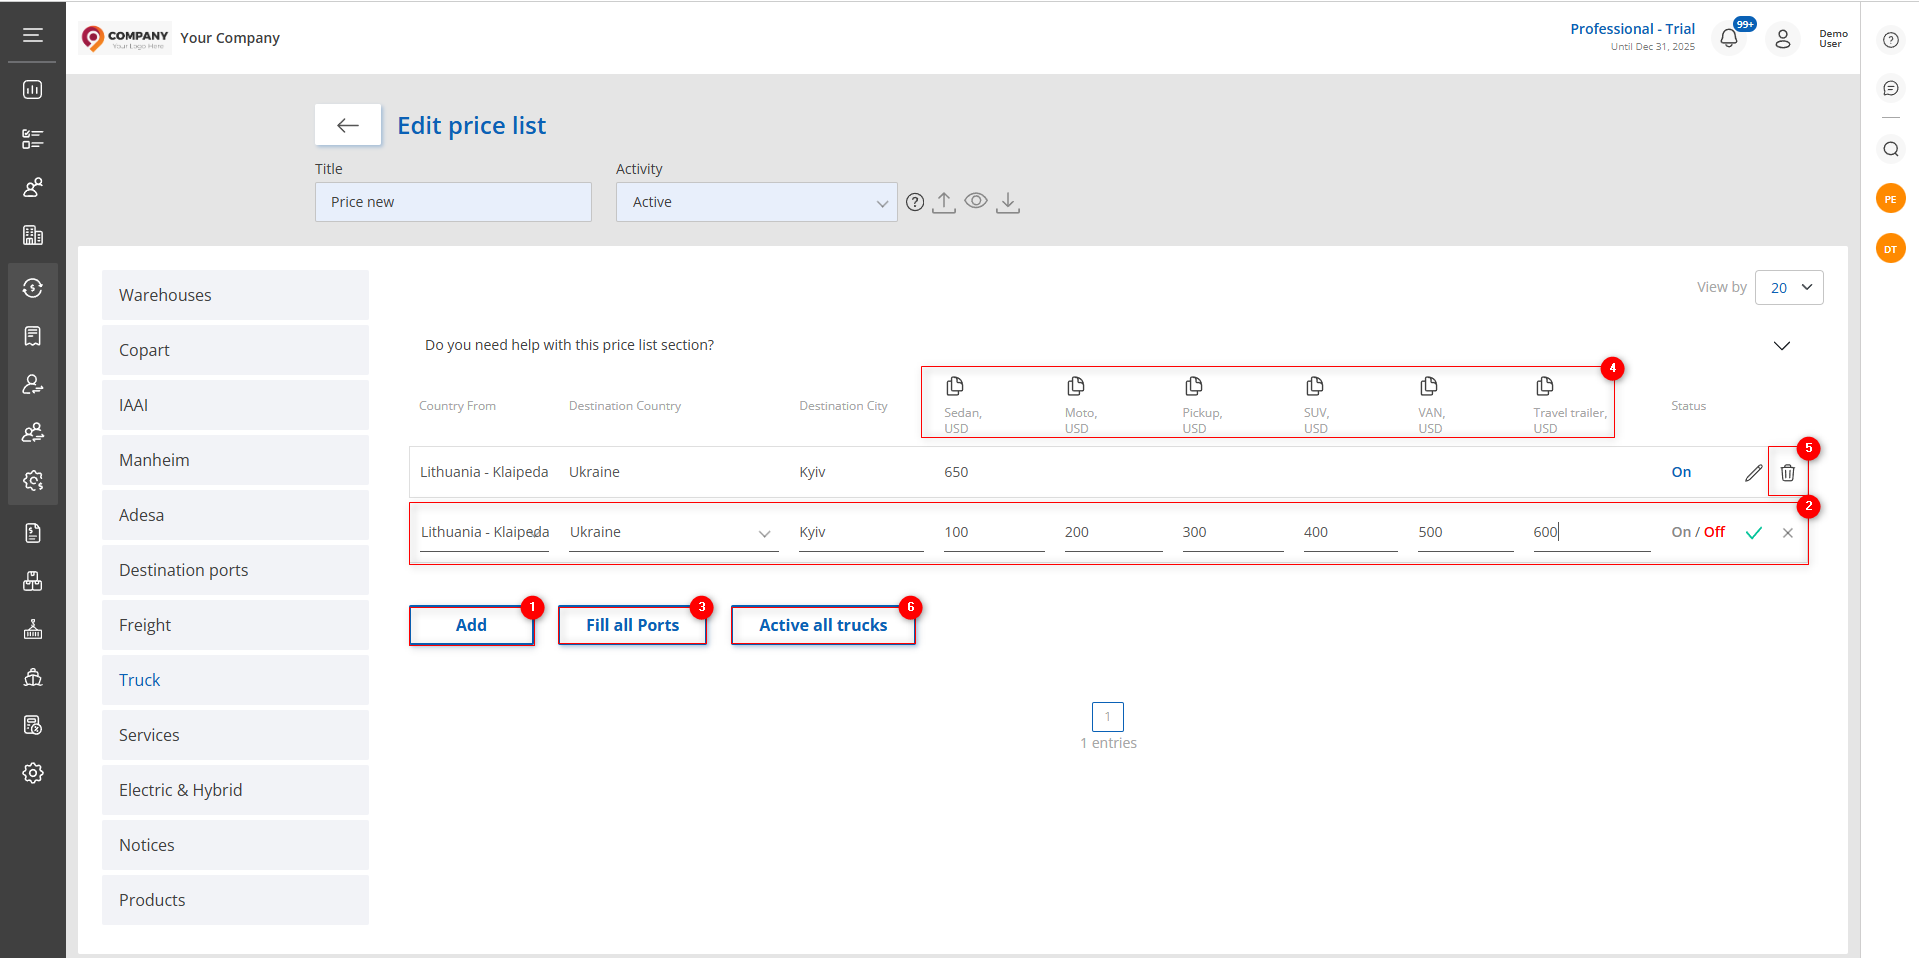 Figure 10 - "Truck" tab
If you need to delete a line, click on the ![]() button (Figure 10, Pointer 5). Confirm the deletion in the window that appears (Figure 11).
button (Figure 10, Pointer 5). Confirm the deletion in the window that appears (Figure 11).
 Figure 11 - Confirmation/Cancellation of Truck Deletion
To activate all carriers, click on the “Active all trucks” button (Figure 10, Pointer 6). Confirm the action in the window that opens (Figure 12).
 Figure 12 - Confirming/disconfirming activation of all trucks
"Services" tab
To add the cost of additional services that occur during the delivery process, click on the "Add" button (Figure 13, Pointer 1). This will add a line (Figure 13, Pointer 2), in which fill in the field:
-
“Country” - from the drop-down list that opens when you click on the
 button, select the country in which the service will be provided;
 -
“Service” - enter the name of the service;
-
Using the keypad enter the service price in the appropriate field by vehicle type (Figure 13, Pointer 3);
-
"Status" - click on the “On” button to activate the service, in case of cancelation the "Off" button;
-
“Use product in invoicing” - if it is necessary that the product is automatically added to the customer's invoice, enable the "On" option. If the addition is not required - turn “Off” off
-
“Use in calculator” - click the “On” button to have the service factored into the shipping calculator for the customer.
Note: The service must also be added in the client modal window under the Account Settings tab.
To save the data, click the ![]() button , as a result the created service/s will be displayed on the tab.
button , as a result the created service/s will be displayed on the tab.
To create multiple services, add the required number of rows and repeat the process of filling in the fields (described above).
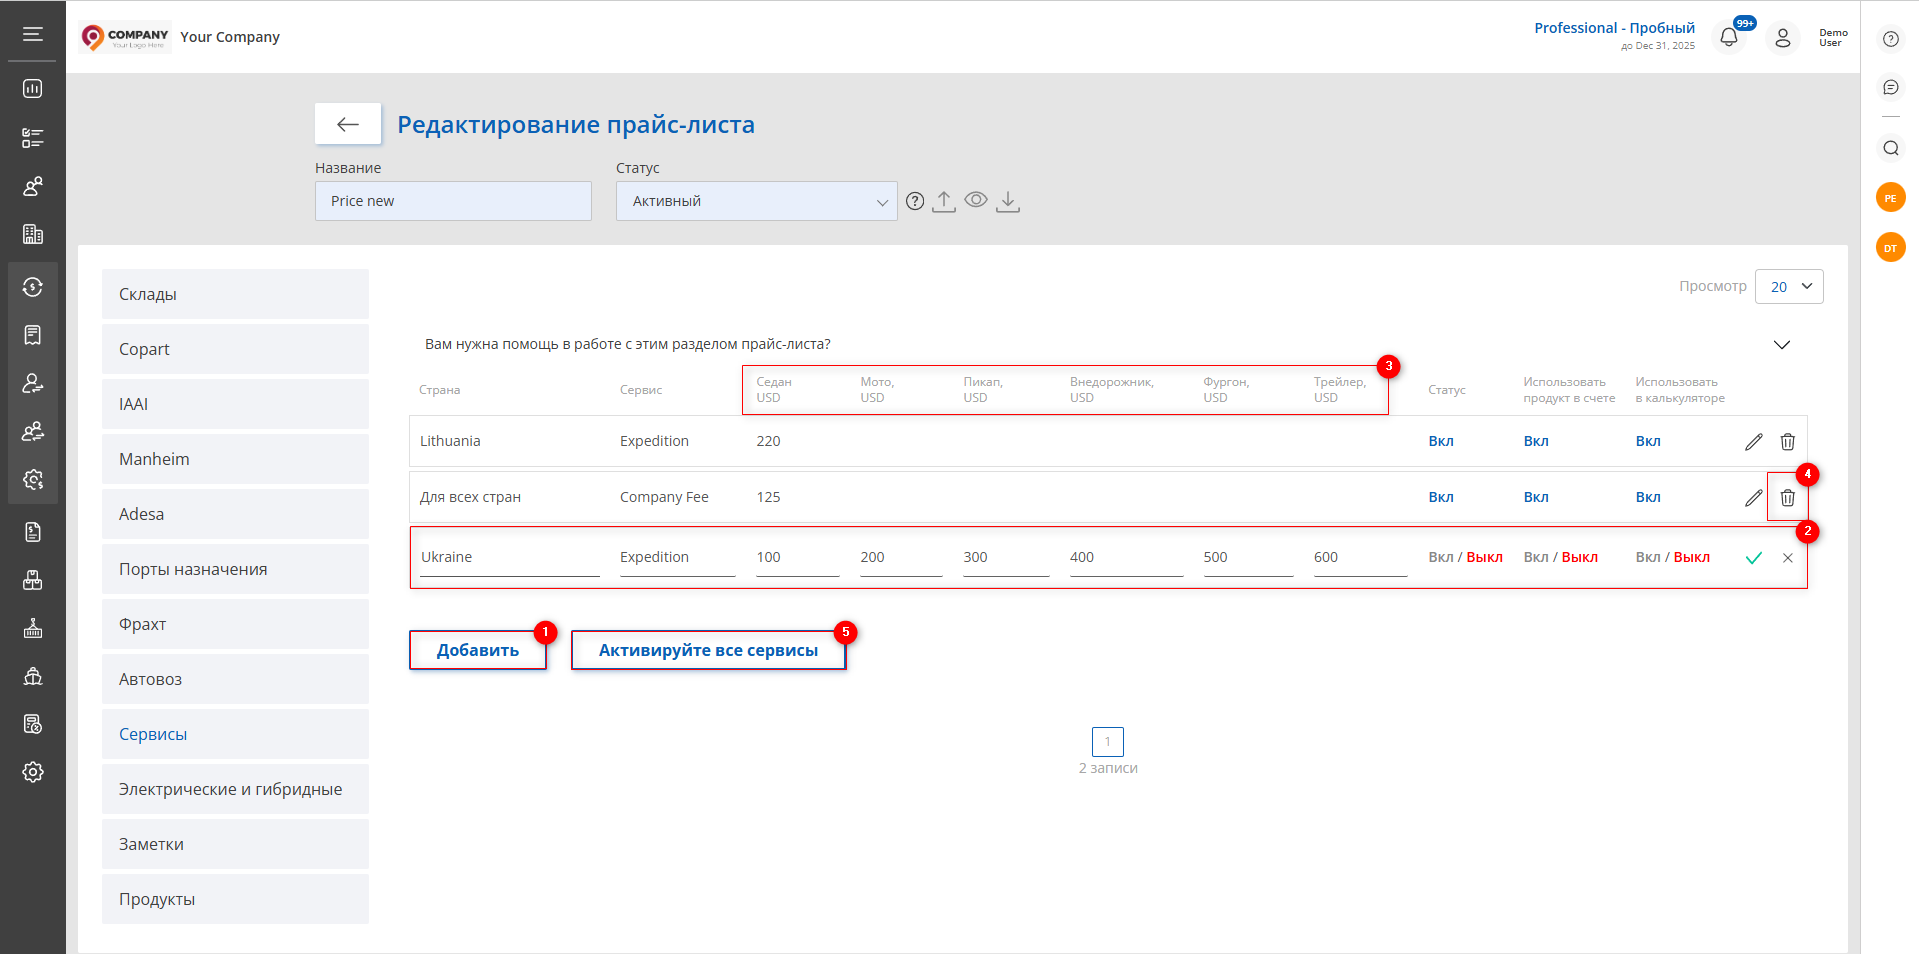 Figure 13 - "Services" tab
If it is necessary to delete a line, click on the ![]() button (Figure 13, Pointer 4). Confirm the deletion in the window that appears (Figure 14).
button (Figure 13, Pointer 4). Confirm the deletion in the window that appears (Figure 14).
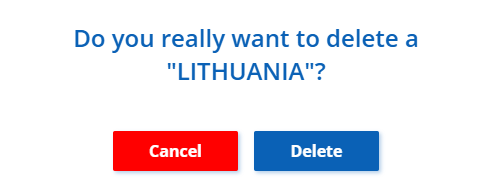 Figure 14 - Confirmation/cancellation of service deletion
To activate all services, click on the “Activate all services” button (Figure 13, pointer 5). Confirm the action in the window that opens (Figure 15)

Figure 15 - Confirmation/cancellation activation of all service
Tab "Electric & Hybrid"
To add a service cost for financial risk services related to the delivery of electric and hybrid vehicles, click the ![]() button (Figure 16, Pointer 1) next to each of the fields and enter the appropriate cost.
button (Figure 16, Pointer 1) next to each of the fields and enter the appropriate cost.
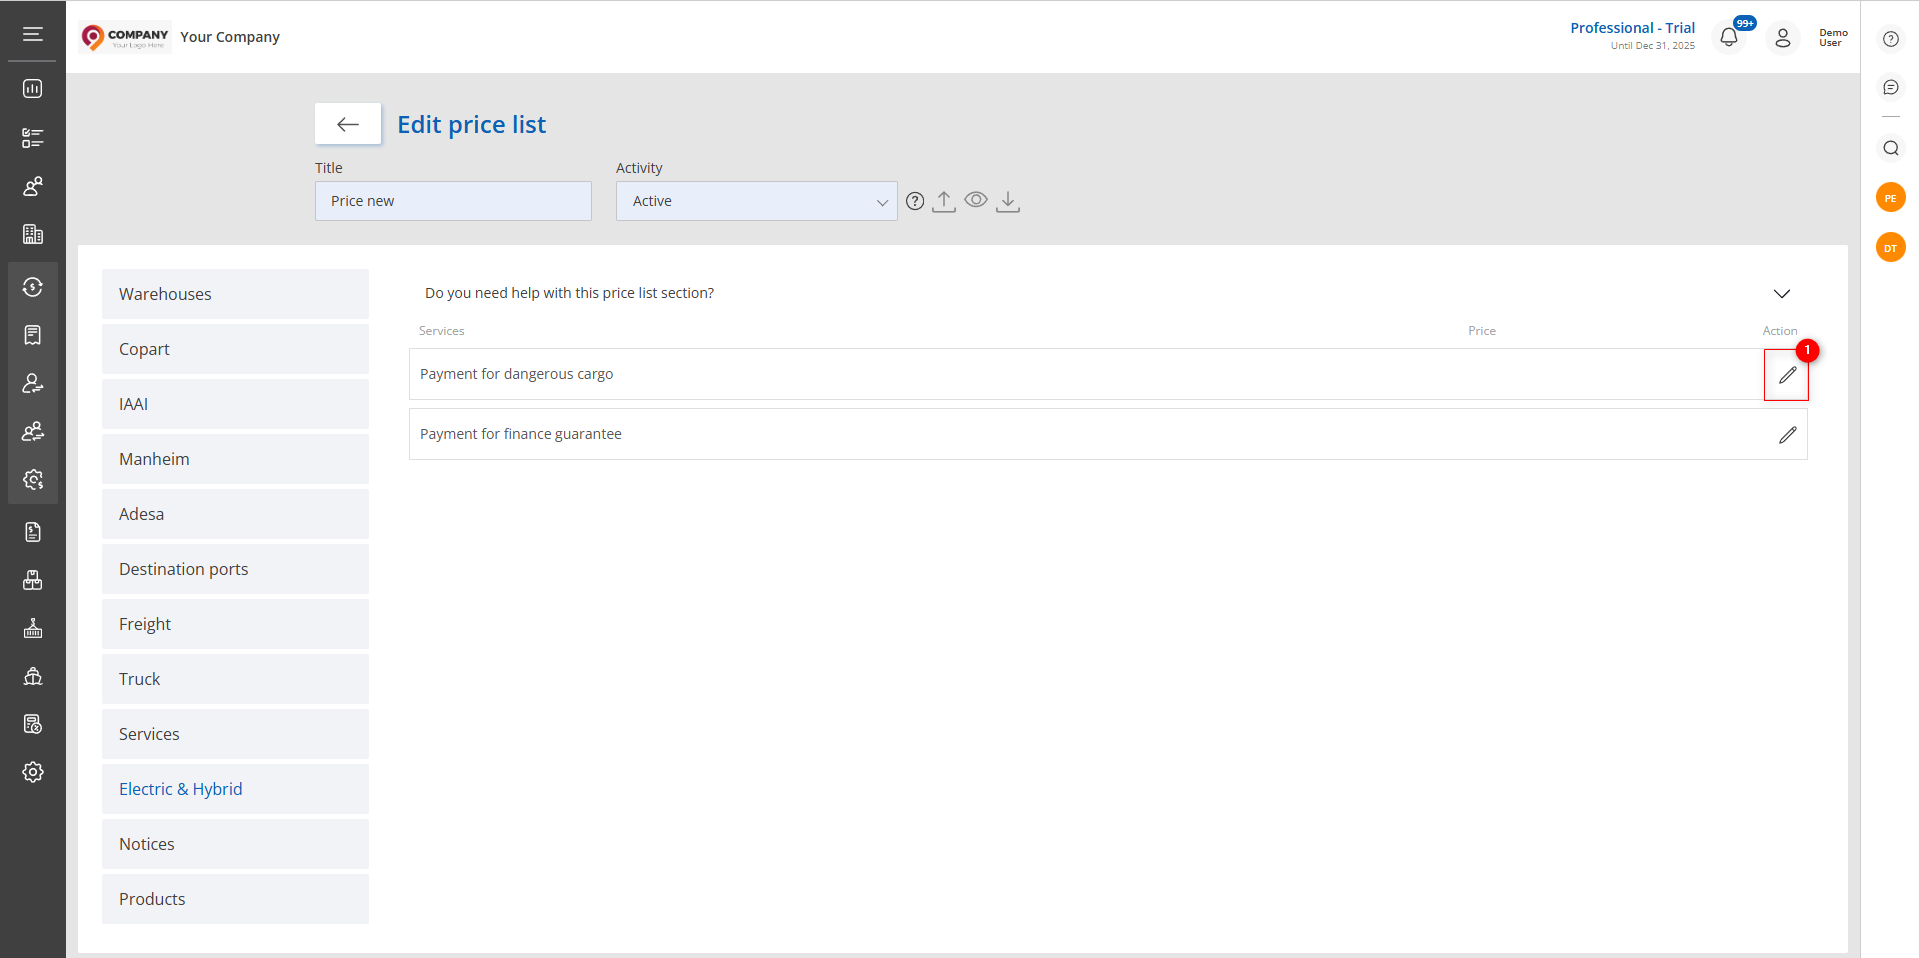 Figure 16 - Electric and Hybrid tab
"Notices" tab
The tab is designed for message management, here you can add a new notification by entering the appropriate text using the keyboard. This functionality provides a convenient way to update and distribute important messages or notifications in the price list.
Enter the text and click on the "Save" button, to cancel the button - "Close".
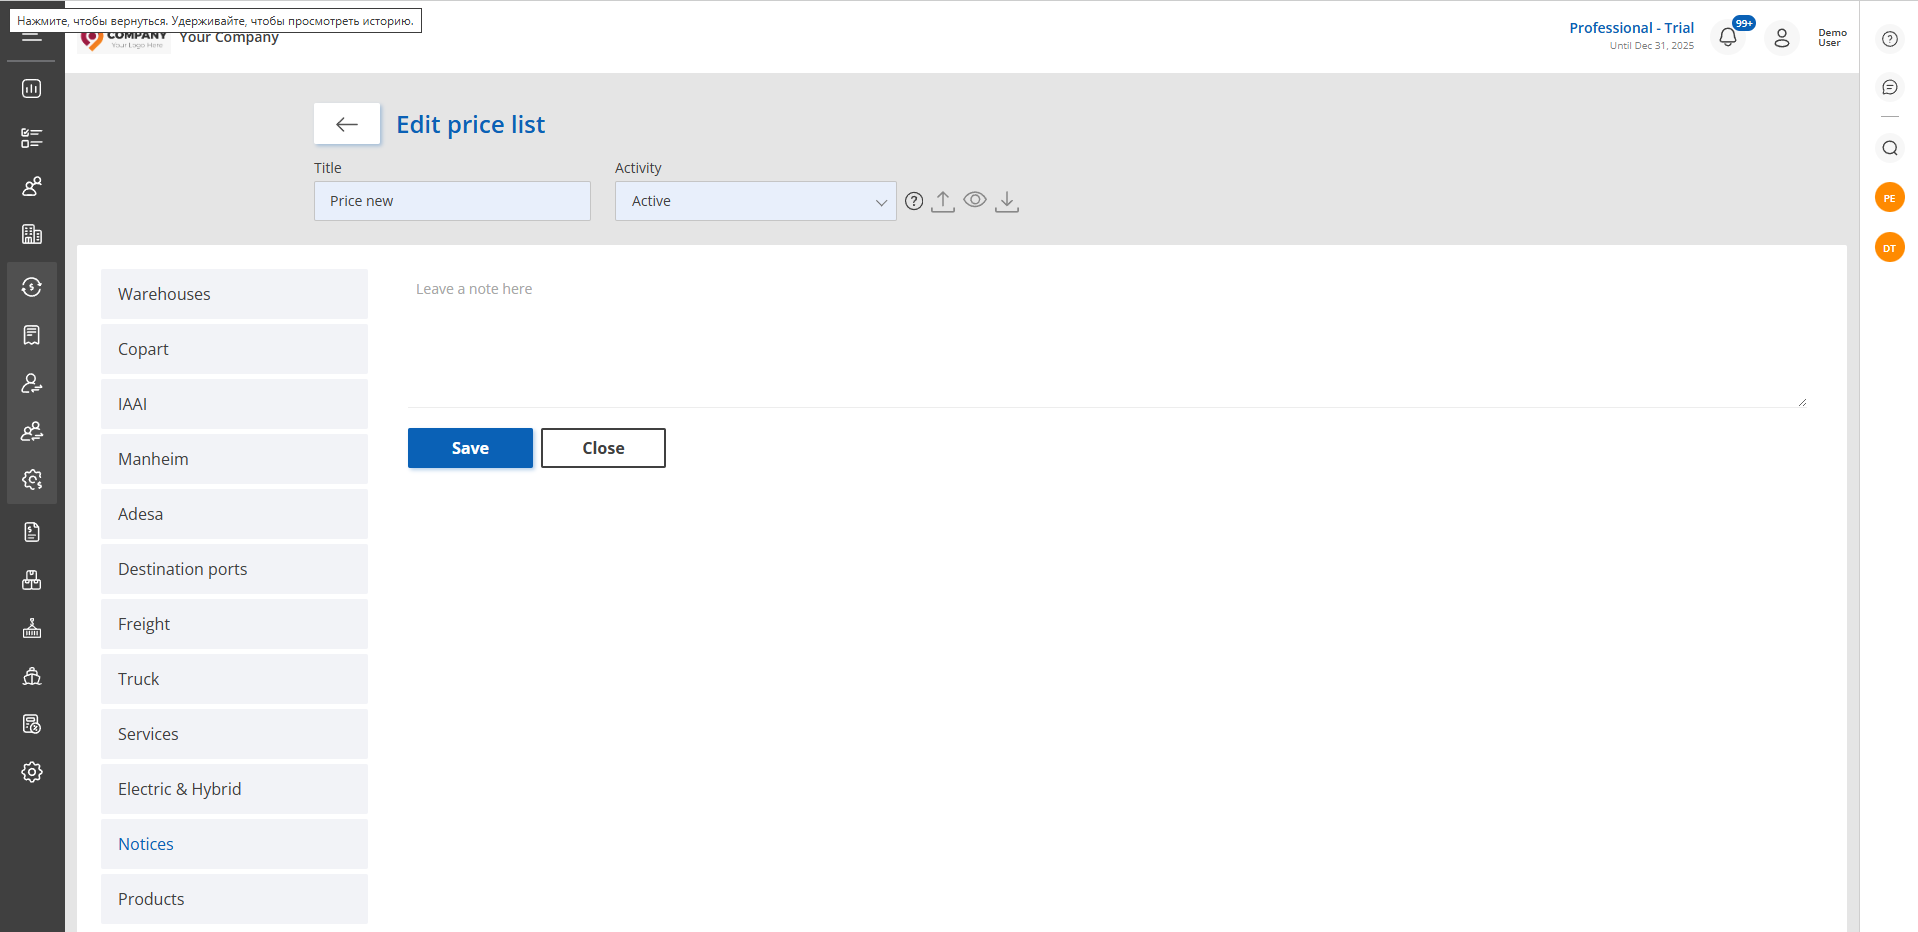 Figure 17 - Notifications tab
The “Products” tab
This tab contains the transportation stages to which products are bound, which will be automatically filled in the shipping calculation in the transaction modal window, provided that this price list is selected.
To do this, click on the “Edit” button. Then select the product to be assigned to the transportation stage (Figure 18, Pointer 1), set the activity status using the “On/Off” switch (Figure 18,Pointer 2) and save the changes by clicking on the “Save” button. If you want to cancel the action, click “Cancel”.
When the button ![]() is clicked, the product will be deleted and the status of the transport stage will be “Off”
is clicked, the product will be deleted and the status of the transport stage will be “Off”
 Figure 18 - Product tab