


Logiline| Logistic CRM system - Site page "Warehouses"
To open the site's "Warehouses" page, go to the "Settings" menu section and select the "Warehouses" tab (Figure 1, Pointer 1). You will then be redirected to the warehouse management page where you can create and edit warehouses. A search bar will also be available on this page.To search for a warehouse, enter its name or state and click the ![]() button, to reset the search click on the
button, to reset the search click on the ![]() button.
button.
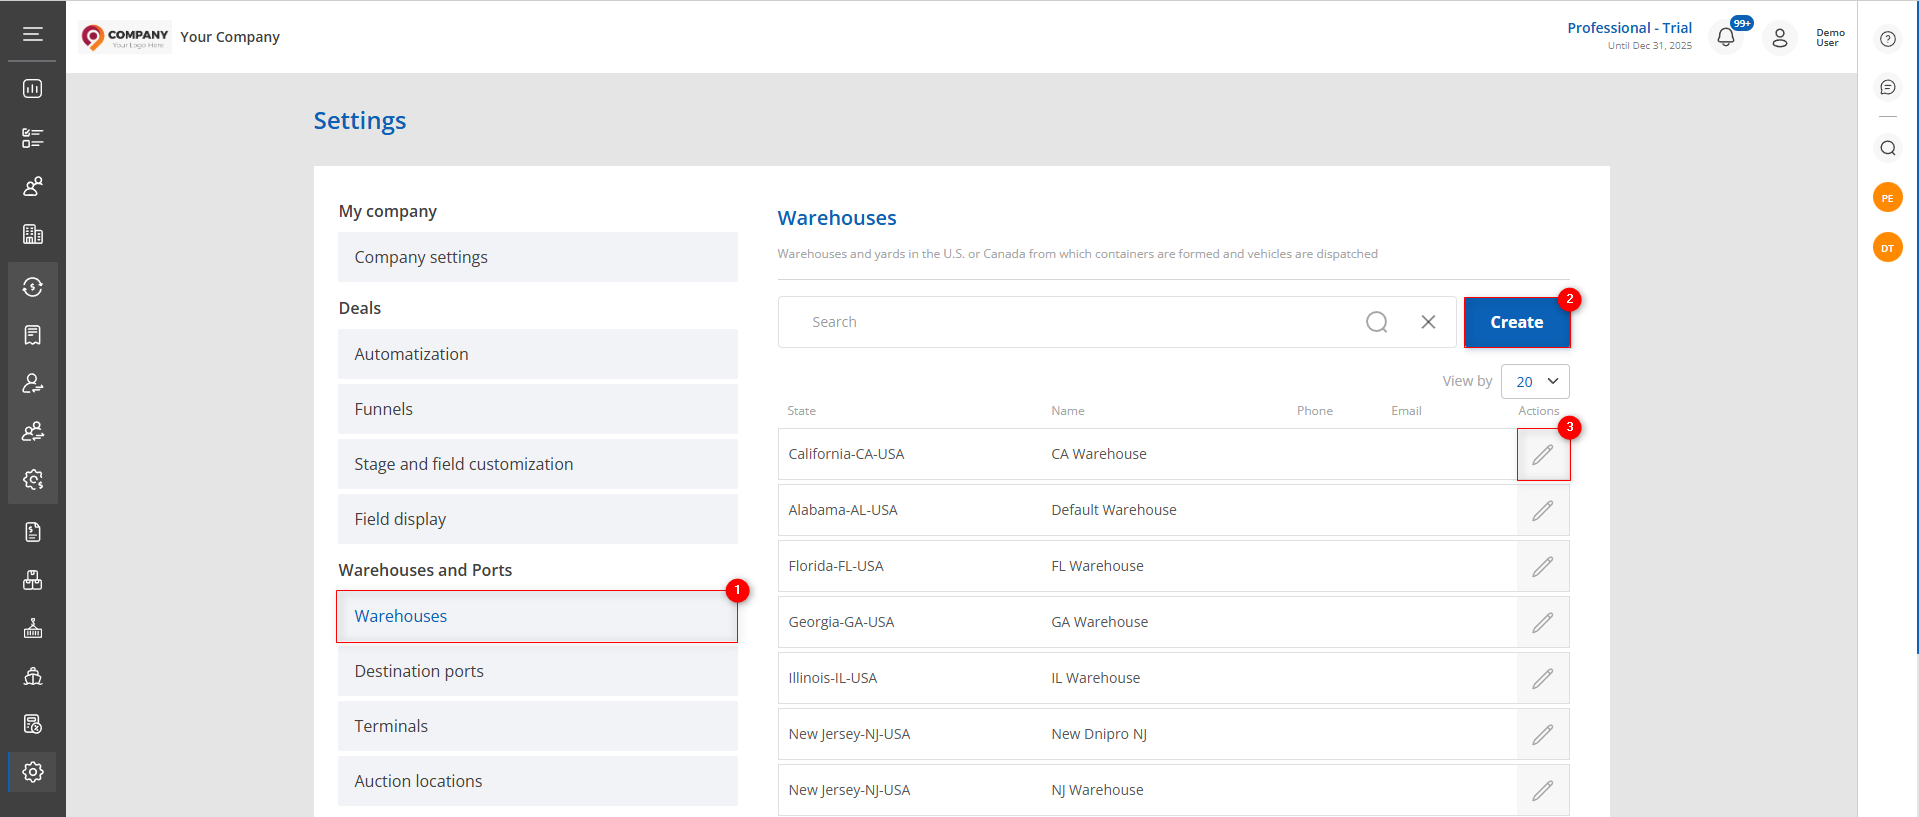
Figure 1 - Site page "Warehouses"
Adding a warehouse
To add a warehouse from which the loading will be carried out, click the "Create" button (Figure 1, Pointer 2). This will open the "Warehouse" window, which contains two information blocks.
- General Information Block (Figure 2, Pointer 1). This block displays general details about the warehouse.
-
"Name" – enter the name of the warehouse;
-
"Name for client" – specify the name that will be shown to the client (if needed);
-
"Responsible" – from the dropdown list that opens when clicking the button, select the employee responsible for overseeing the delivery process;
-
"Service Company" – select the logistics provider;
-
"Phone" – enter a contact phone number;
-
"Email" – provide the warehouse’s email address;
-
"Website" – enter the warehouse’s website URL.
- Warehouse Address Block (Figure 2, Pointer 2). This block displays the location and contact details of the warehouse.
-
"Address 1" – enter the primary address;
-
"Address 2" – provide an additional address (if necessary);
-
"Country" – indicate the country where the warehouse is located;
-
"State" – specify the state;
-
"City" – enter the city in which the company operates;
-
"ZIP сode" – enter the postal code.
Note: The fields “Name”, “Name for client” “Country,” and “City” are mandatory.
To save the information, click the "Save" button. To cancel, click "Close". The created warehouse will then be displayed in the table.
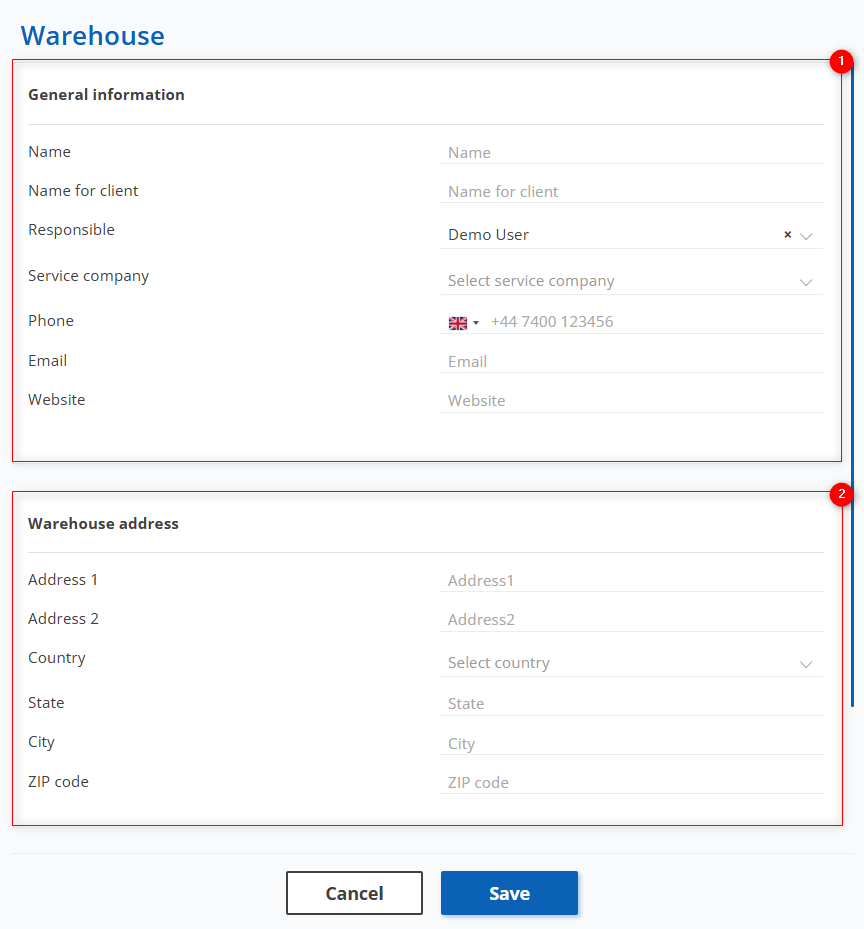
Figure 2 - "Warehouse" window
Editing a Warehouse
To edit warehouse data, click the ![]() button located on the right side of the record in the table (Figure 1, Pointer 3). This will open the "Warehouse" window, where you need to click the "Edit" button to modify the data (Figure 3, Pointer 1). The editing process is similar to creating a new entry, but when editing, an additional block called "Contact Person" becomes available.
button located on the right side of the record in the table (Figure 1, Pointer 3). This will open the "Warehouse" window, where you need to click the "Edit" button to modify the data (Figure 3, Pointer 1). The editing process is similar to creating a new entry, but when editing, an additional block called "Contact Person" becomes available.
This block displays information about the responsible staff member who can be contacted regarding the receipt, storage, or dispatch of vehicles. To add a contact person, click the "Add Contact" button (Figure 3, Pointer 2). A new window will open where you can fill in the first name, last name, job title, phone number, and email address. If necessary, you may also leave a comment in the "Note" field. After filling out the form, click "Save". As a result, the updated warehouse information will be displayed in the table (Figure 3, Pointer 3).
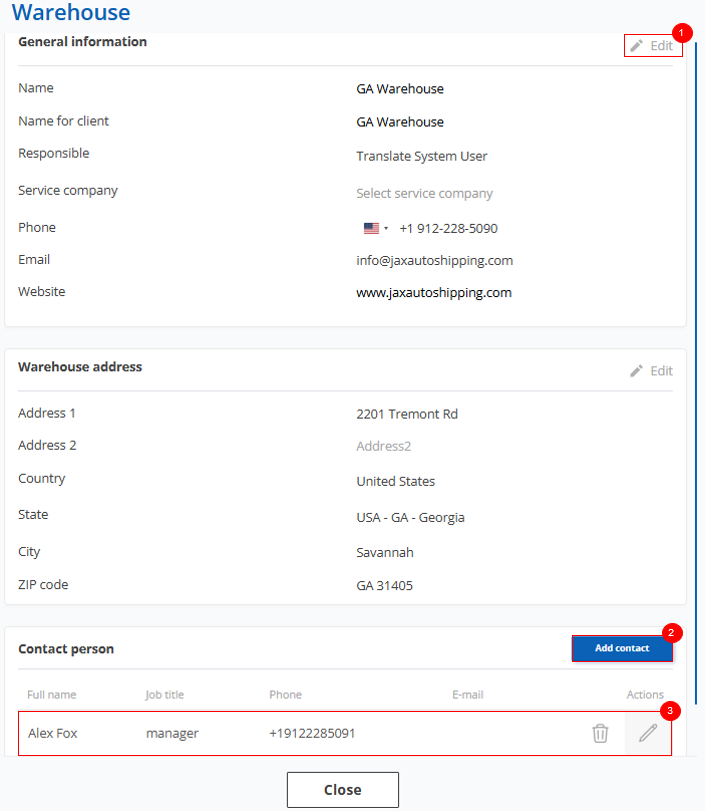
Figure 3 – Editing the “Warehouse” window