


Logiline| Logistic CRM system - Site page "Auction Locations"
To open the "Auction Locations" page, go to the "Settings" menu section and select the "Auction Locations" tab (Figure 1, Pointer 1). After that, you will be redirected to a page where you can view and edit auction locations.
This page also includes a search bar (Figure 1, Pointer 3). To search for a location, in the top field (Figure 1, Pointer 2) select the desired auction, then enter the location name or the state where it is located in the search bar and press the button , to reset the search, press the button
.
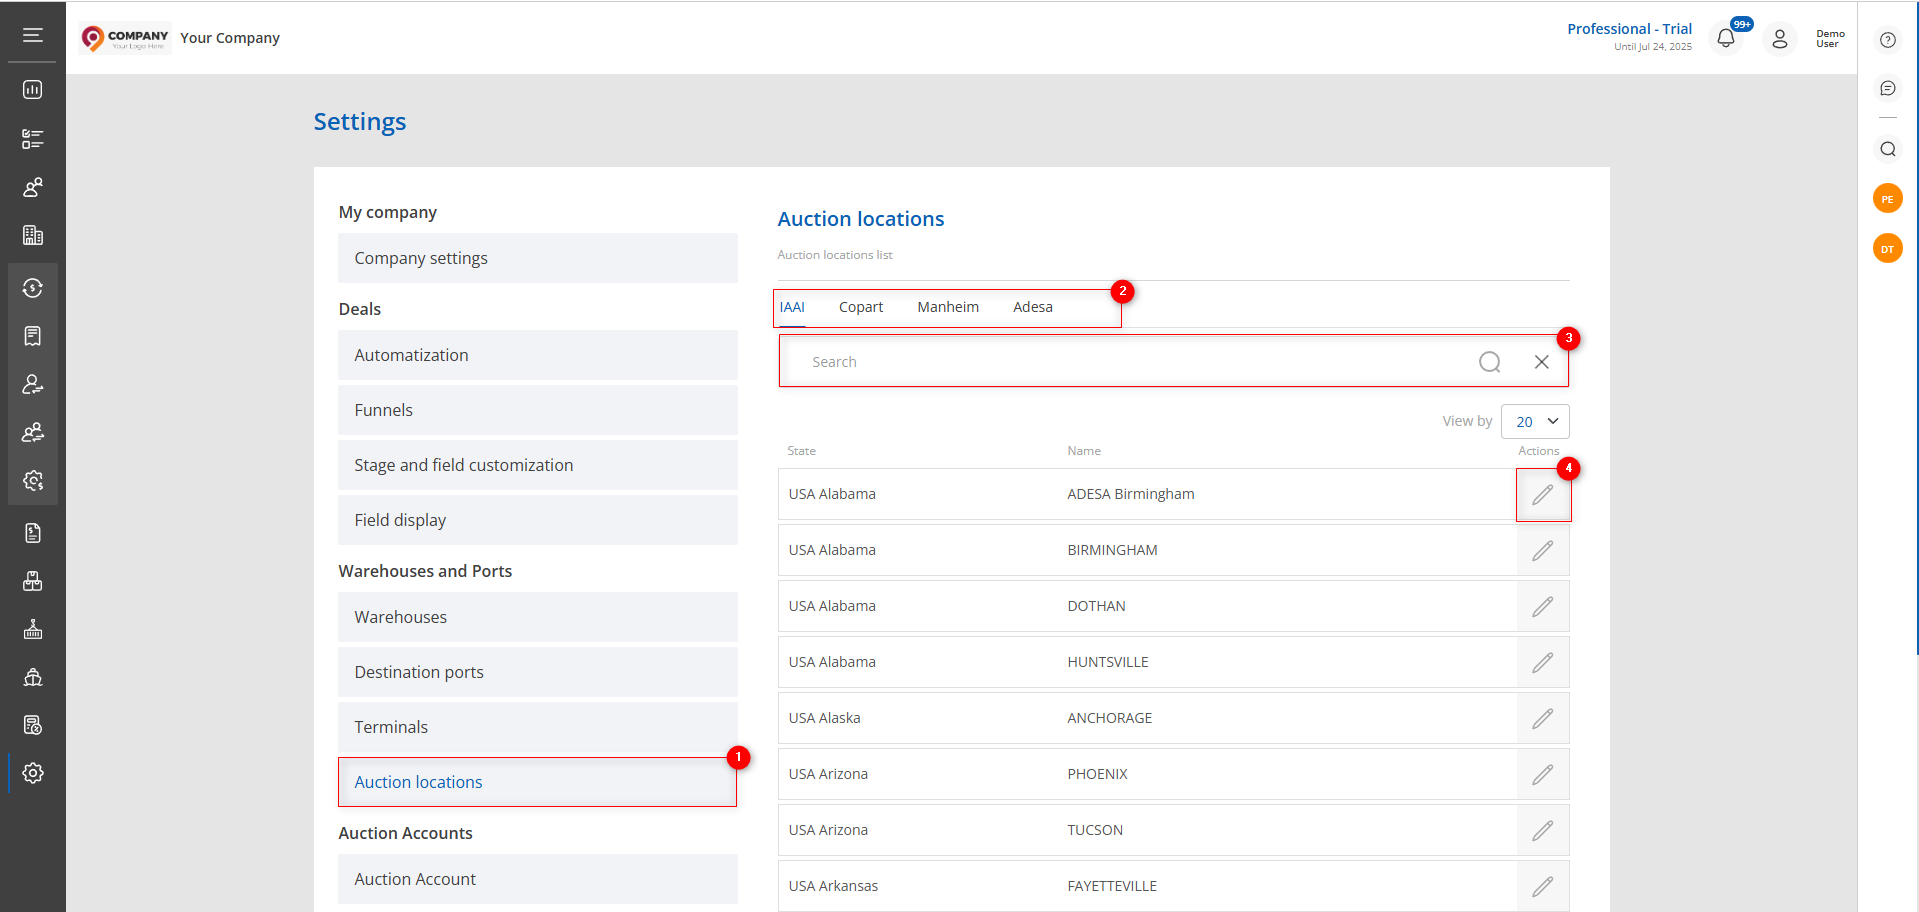
Figure 1 – “Auction Locations” рage
Editing a Location
To edit a location, click the button (Figure 1, Pointer 4). This will open the “Auction Location” window (Figure 2), which contains three information sections. To edit the data, click the “Edit” button (Figure 2, Pointer 1).
- “General Information” block. This section displays general details (Figure 2, Pointer 2):
-
“Responsible” – from the dropdown list that opens when you click the button, select the employee overseeing the process at this location;
-
“Service Company” – select the organization providing logistics services;
-
“Phone” – enter the contact number;
-
“Email” – specify the auction location’s email address;
-
“Website” – enter the auction location’s web address.
Note: Please note that the fields “Auction” and “Name” are not available for editing.
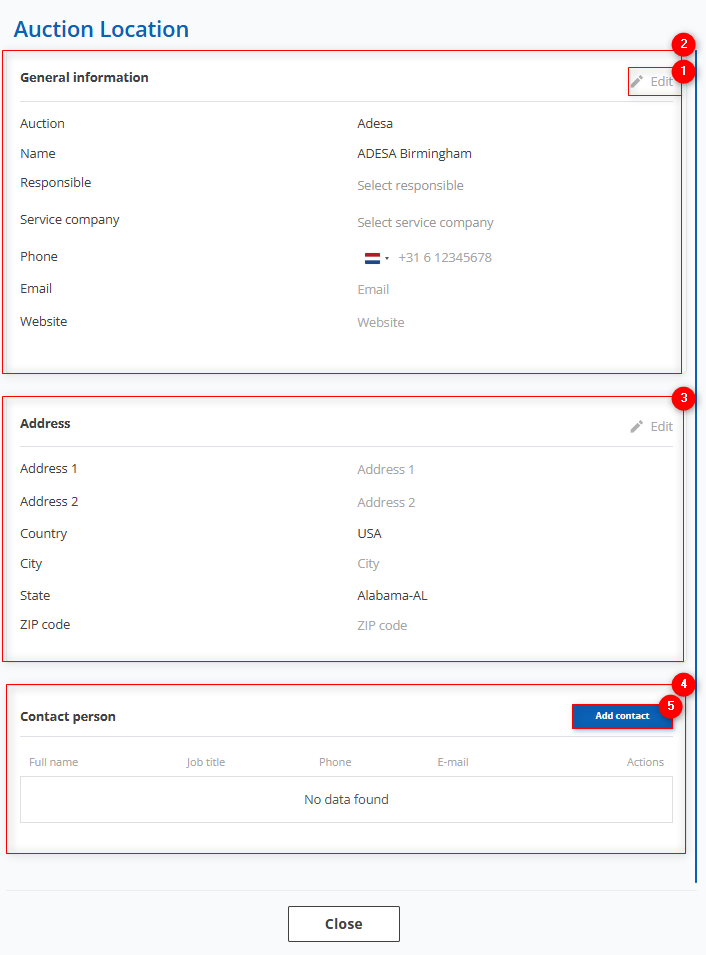
Figure 2 – “Auction Location” Window
- “Address” Block contains information about the location and contact details of the auction location (Figure 2, Pointer 3). The fields “Address 1,” “Country,” “City,” “State,” and “Zip Code” are automatically filled by the system based on auction data. If necessary, you can modify these details or add additional information.
- “Contact Person” block displays the details of the responsible employee who can be contacted regarding matters related to the operation at this auction location (Figure 2, Pointer 4). To add a contact person, click the “Add Contact” button (Figure 2, Pointer 5). This will open the “Contact” window (Figure 3), where you can enter the first name, last name, position, phone number, and email. If needed, you can also add a comment in the “Notes” field.
To save the data, click the “Save” button; to cancel, click the “Close” button. The entered data will then be displayed in the “Contact Person” Block.
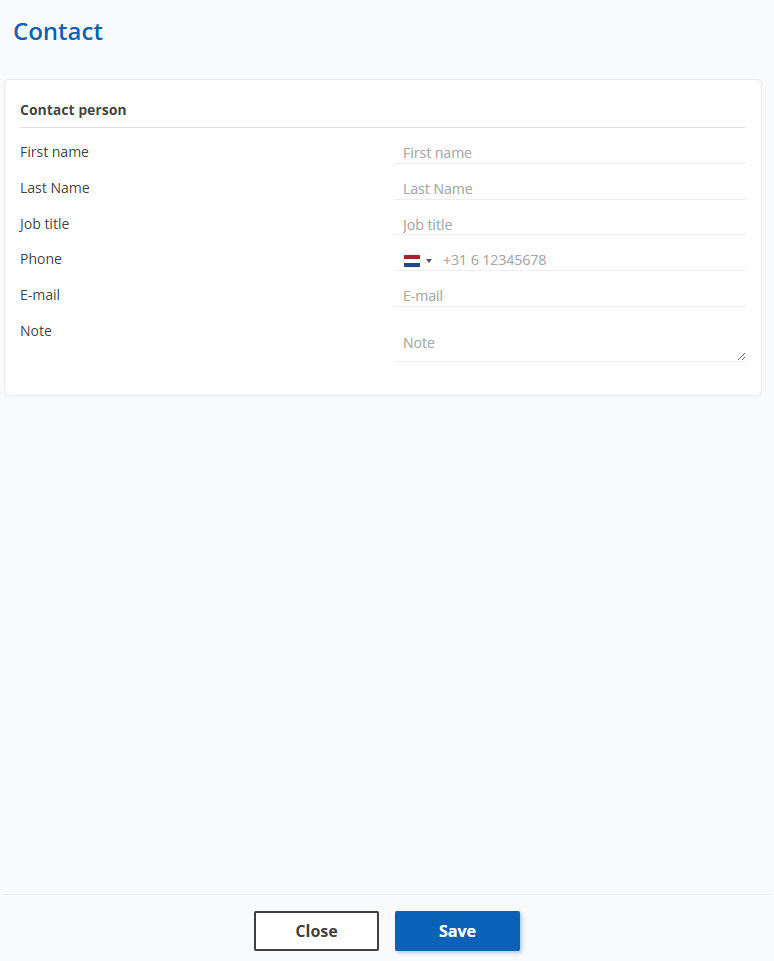
Figure 3 – “Contact” Window