


Logiline| Logistic CRM system - Site page "Auction"
The “Auctions” page provides the user with a convenient and multifunctional tool for working with lots purchased through various auction accounts.
The "Auctions" page is a section that provides information about all vehicles purchased through auction accounts. It displays detailed data for each lot.
To get started, you need to connect your auction accounts. To do this, go to the "Settings" menu and open the "Auction Accounts" section. Add accounts from Copart and IAAI auctions. Once the accounts are added, the system will automatically activate synchronization, and all purchased lots will begin to appear in the table (see the description of the "Auction Accounts" page).
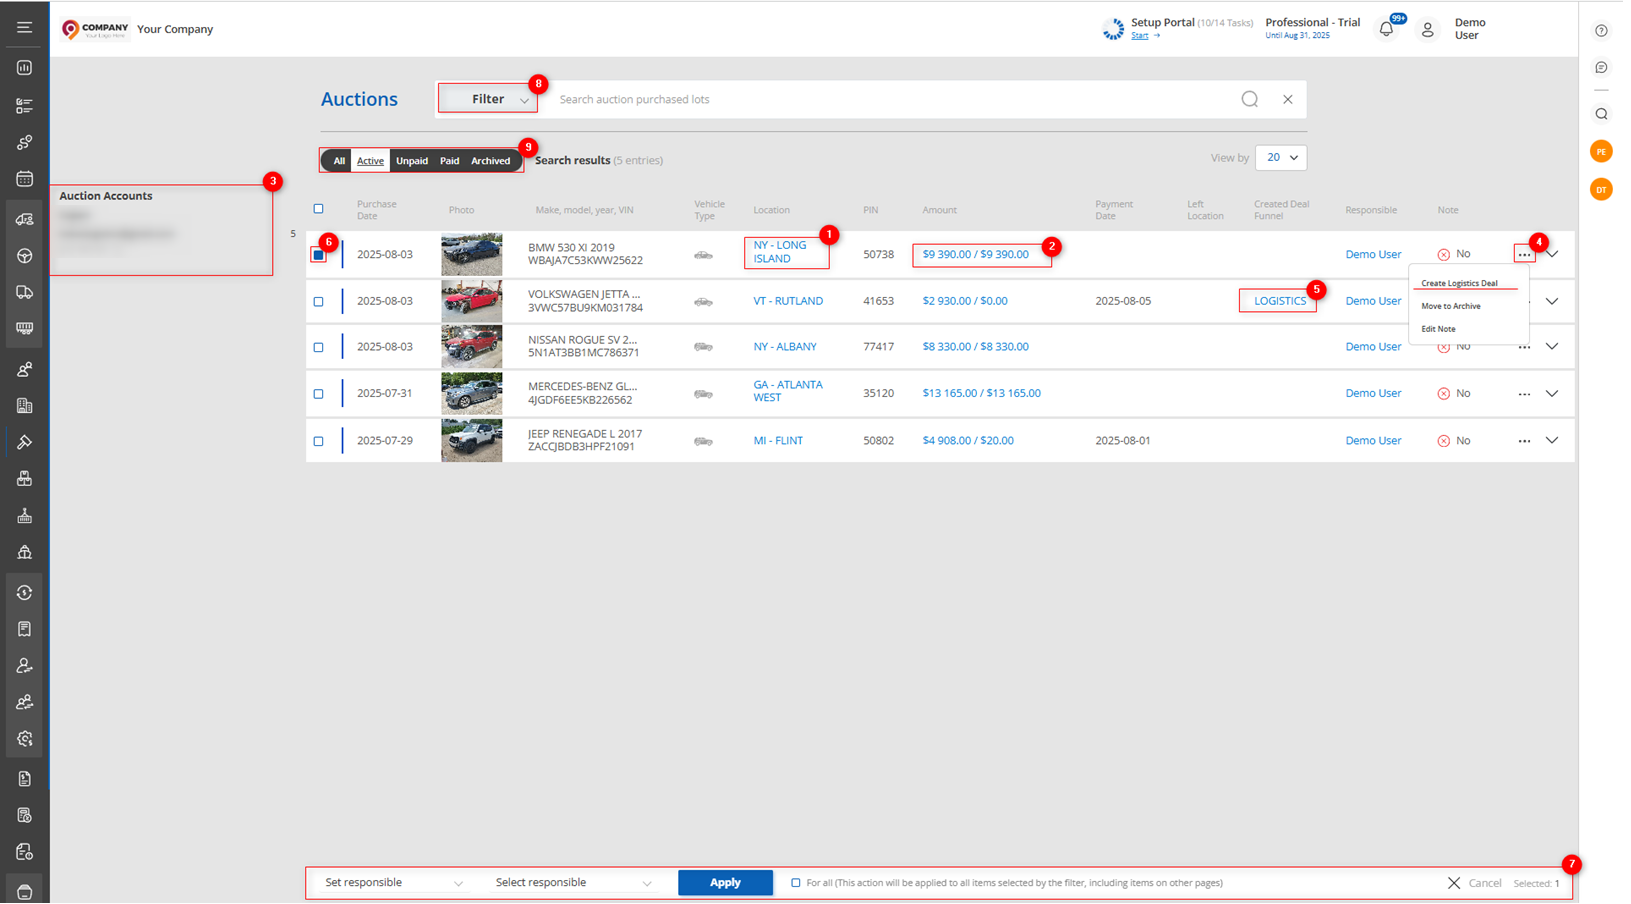
Figure 1 — "Auctions" page
The page contains a table with information about the purchase date, make, model, year of manufacture, vehicle type, and auction location. Each lot displays photos of the vehicle. The invoice history, payment date, date of removal from the auction site, and responsible employee are also available.
When you click on the location (Figure 1, Pointer 1), a window opens showing the auction, location name, as well as information about the location’s address and contact details. If necessary, you can edit or add additional information. To do this, click the "Edit" button (Figure 2, Pointer 1) — the fields will become available for editing (see the description of the "Auction Locations" page).
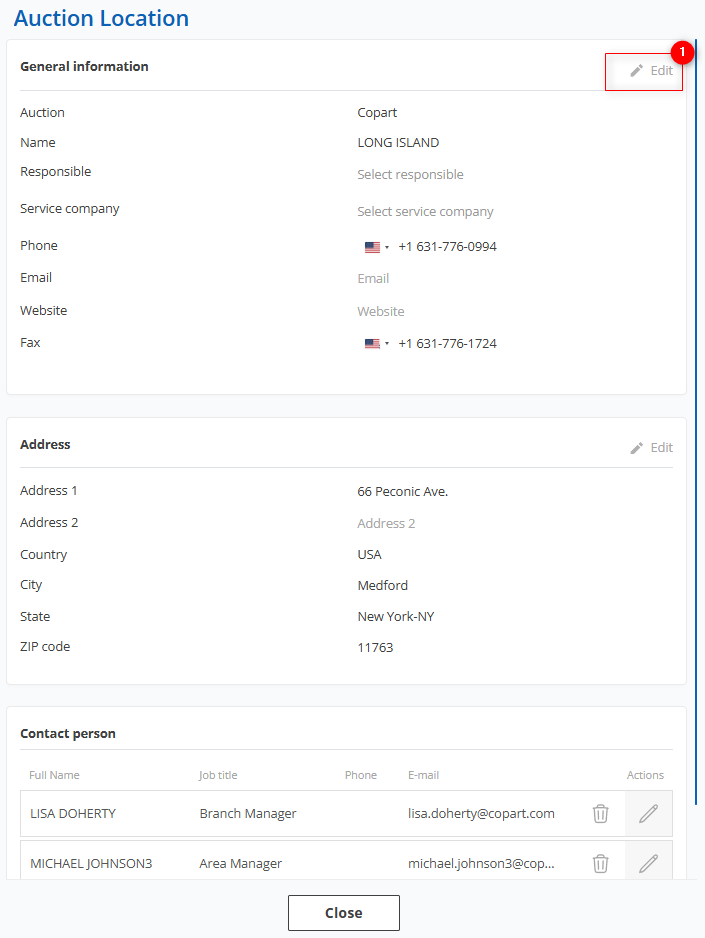
Figure 2 — Auction location window
The amount in the table displays the total invoice amount and the amount due (Figure 1, Pointer 2). When you click on it, an invoice window opens showing complete information about the cost and payments made. The Cost Information section contains a breakdown of costs. Payment Information displays details of payments made: payment date, amount, and description including the payment method.
Below is the Bill of Sale section, which shows invoice creation dates and provides buttons for downloading documents (Figure 3).
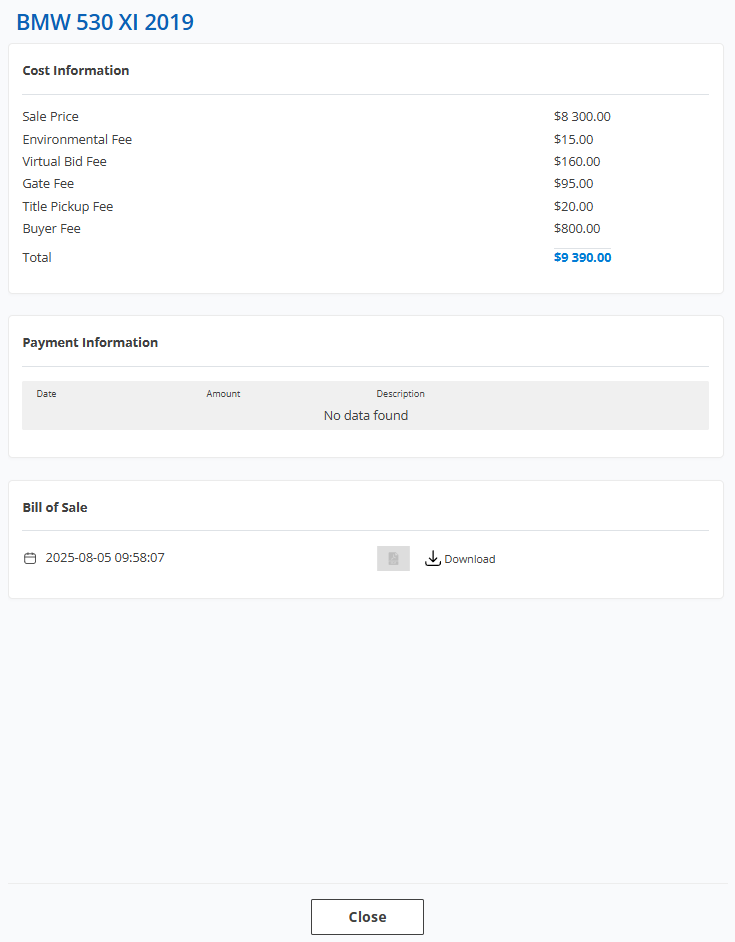
Figure 3 - Auction account window
On the left, in the Auction Accounts block, a list of connected accounts is displayed (Figure 1, Pointer 3). When you click the ![]() button, a window opens showing the account balance history, where all incoming funds, debits, and allocations to specific lots are displayed (Figure 4).
button, a window opens showing the account balance history, where all incoming funds, debits, and allocations to specific lots are displayed (Figure 4).
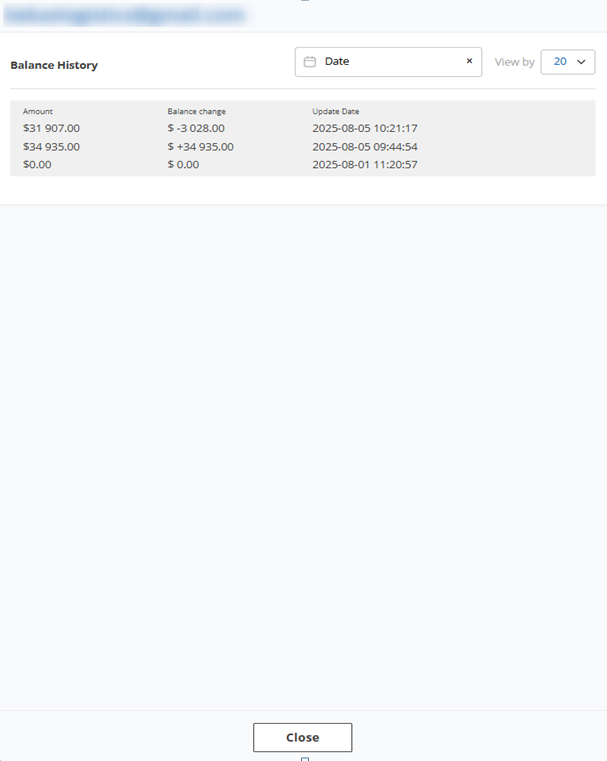
Figure 4 — Account balance history window
Creating a deal from an auction lot
To create a deal, click on the three dots (Figure 1, Pointer 4), then select "Create deal in logistics" from the menu that appears. A deal window will open, where the system will automatically fill in all the lot details. You will need to specify the client and the destination country. After that, click "Save." The deal will appear on the "Deals" page, and an active link to the full information and history of the deal will be displayed in the lot card (Figure 1, Pointer 5).
Bulk editing function
Also, the page features a bulk editing function. With it, you can assign a responsible person to multiple deals at once. To use this function, check the ![]() box next to each lot you want to edit in the table (Figure 1, Pointer 6). After selecting the deals, a panel will appear at the bottom of the table. Choose the "Set responsible person" option, then select the desired employee from the available choices and click the “Apply” button to save the changes (Figure 1, Pointer 7).
box next to each lot you want to edit in the table (Figure 1, Pointer 6). After selecting the deals, a panel will appear at the bottom of the table. Choose the "Set responsible person" option, then select the desired employee from the available choices and click the “Apply” button to save the changes (Figure 1, Pointer 7).
Search
To set the desired parameters and quickly find the transport you are interested in, use the filtering function. To do this, click the “Filter” button (Figure 1, Pointer 8). A window will open where you can set the filter parameters (Figure 3):
-
“VIN, make, model, year” – enter the data to search for the vehicle;
-
“Auction location” – select the auction where the lot was purchased;
-
“Vehicle type” – set the transport category;
-
“Auction account” – choose the account through which the lot was purchased;
-
“Purchase Date Range” – select a specific date or period during which the vehicle was purchased;
-
“Payment Date Range” – select a specific date or period of payment for the vehicle;
-
“Left Location Date Range” – select a specific date or period when the vehicle was removed from the auction.
After entering the parameters, click the “Search” button, or click “Reset” to cancel.
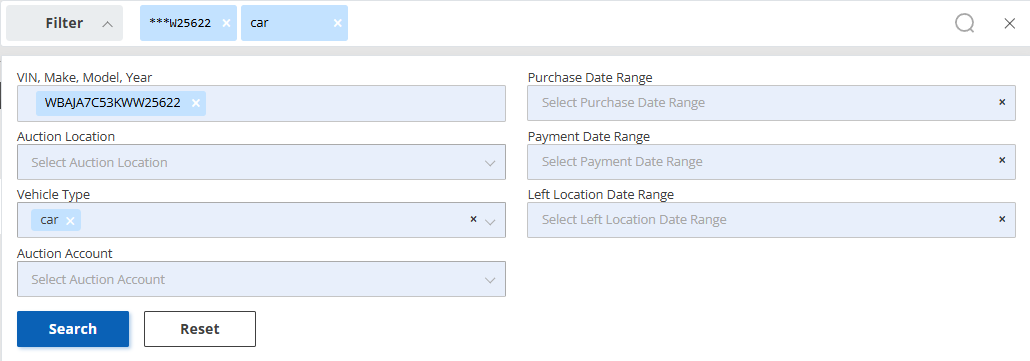
Figure 5 – Filter window
Filtering by status is also available. On the page, there is a toggle switch that allows you to choose which lots to display (Figure 1, Pointer 9):
-
All – shows all available lots without status restrictions;
-
Active – lots currently at the auction where the transport has not yet been removed;
-
Unpaid – lots for which payment has not been made;
-
Paid – lots that have been paid for but without a removal date;
-
Archived – removed from the auction territory.