


Logiline| Logistic CRM system - Site page "Claims"
The “Claims” page is designed to track and generate customer complaints regarding damages to the vehicle during delivery or after it. To open the page, go to the menu section and select the tab "Claims". After that you will be redirected to a page where you can view, keep records, and submit claims. On the “Claims” page there is a search bar, a filter by specified parameters, and a table displaying the list of claims with all relevant information. This data includes: ID, status, creation date, deal type, deal, claim type, responsible person, amount, description (Figure 1).
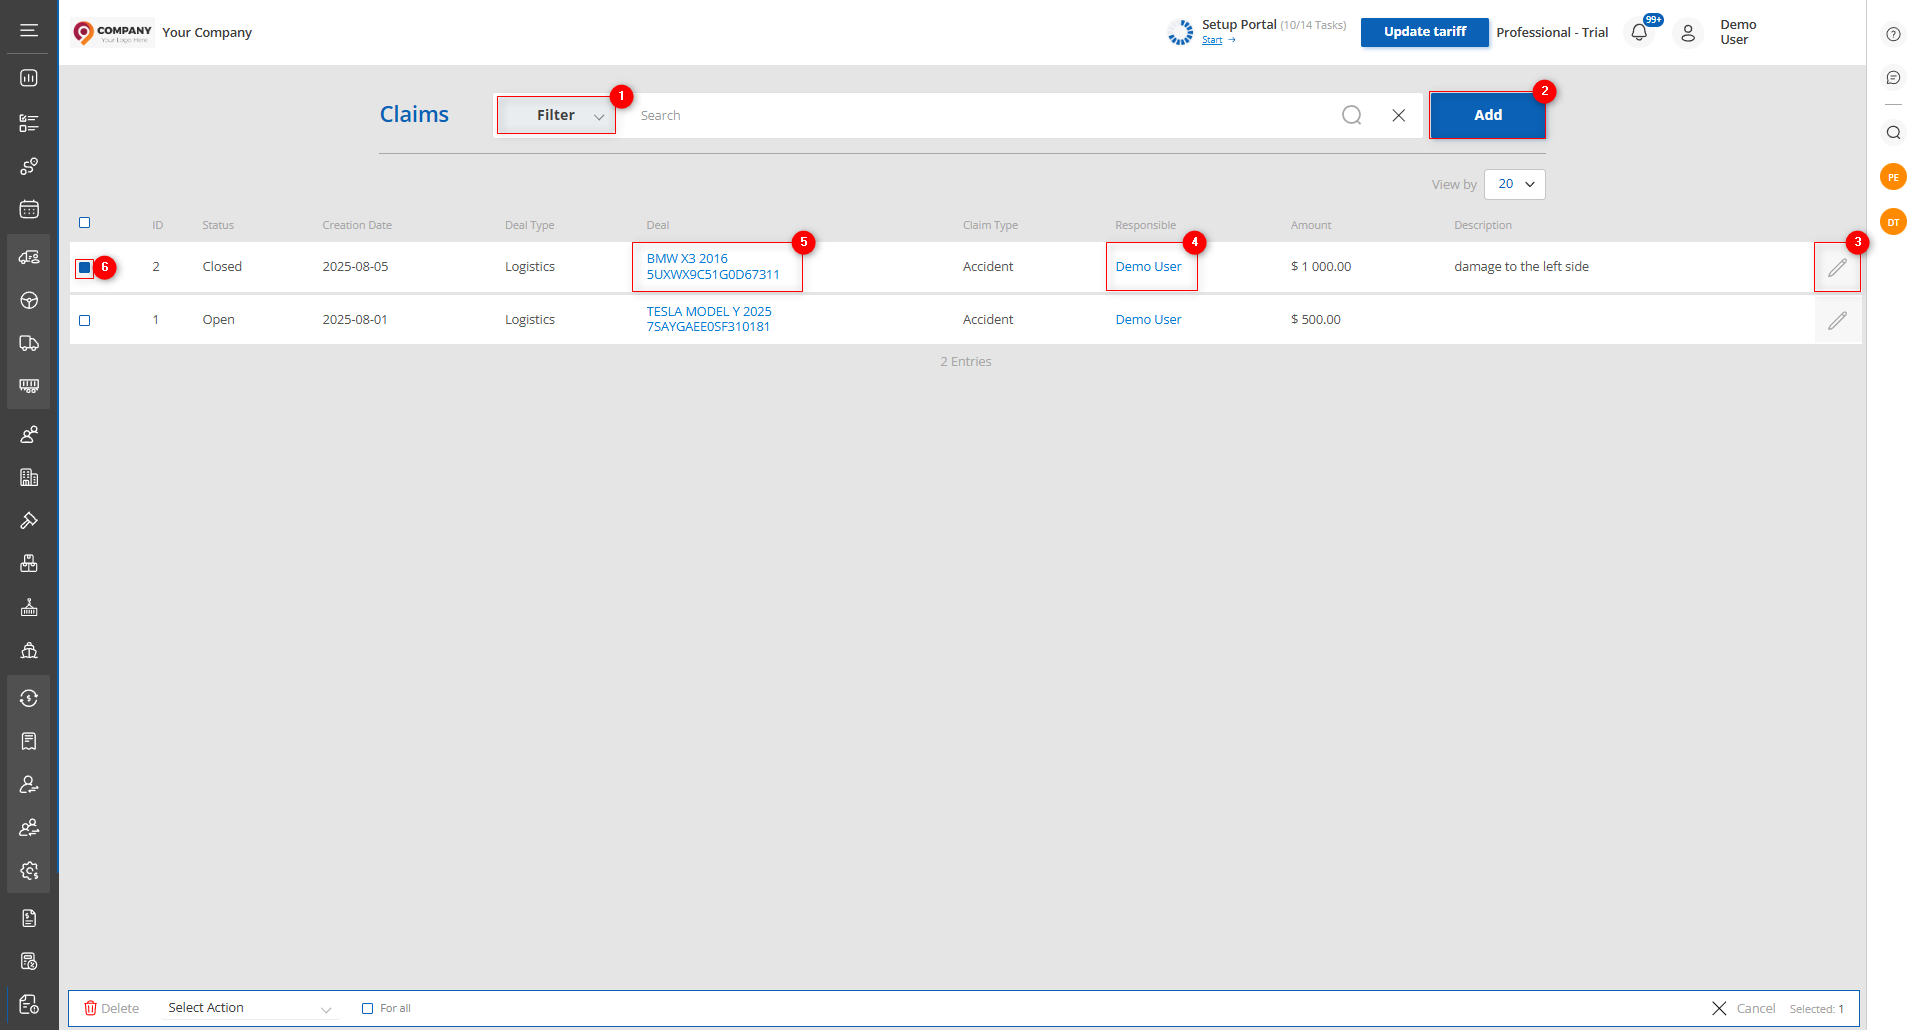
Figure 1 - The site page "Claims"
Search
Search by specified parameters:
When you click the “Filter” button (Figure 1, Pointer 1), a filter window will open, through which search parameters are set (Figure 2):
-
“Search” - enter the required value;
-
“Deal type” - from the dropdown list that opens when you click the
 button, select the required deal type;
 -
“Responsible” - from the dropdown list, select the employee responsible for making decisions;
-
“Creation date” - when you click the empty field, choose a specific creation date of the claim;
-
“Status” - from the dropdown list, select the status of the claim;
-
“Claim Type” - from the dropdown list, select the type of claim;
Note: To perform a search you can set one or more parameters.
After entering the parameters, click the button. As a result, the table will display data according to the configured filter parameters.
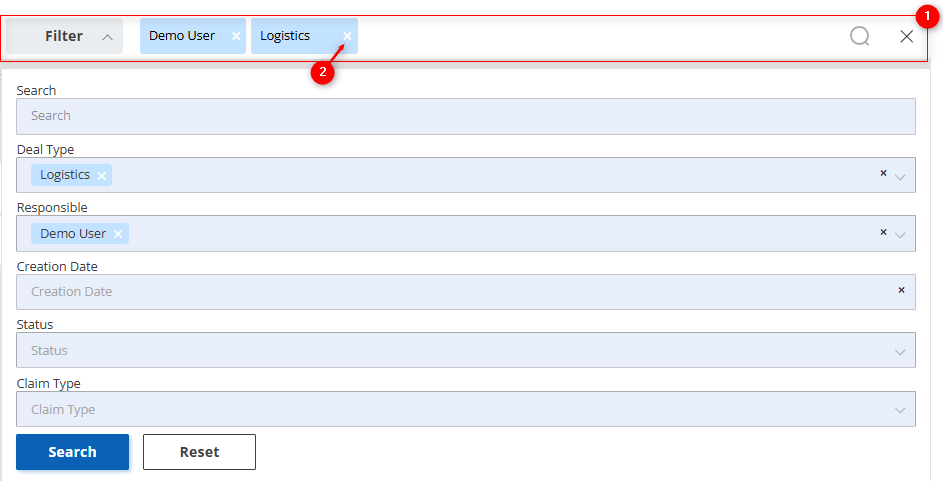
Figure 2 - The "Filter" window
Search in the search bar:
The search bar allows you to search by any parameter (Figure 2, Pointer 1). To do this, enter any query and press the ![]() button located in the search bar or press the “Enter” key on the keyboard. As a result, the records matching the entered parameters will be displayed in the table. To clear the entire search window and reset the filter, click the
button located in the search bar or press the “Enter” key on the keyboard. As a result, the records matching the entered parameters will be displayed in the table. To clear the entire search window and reset the filter, click the ![]() button. If you need to delete one of the parameters, click the cross located in the search query window itself (Figure 2, Pointer 2).
button. If you need to delete one of the parameters, click the cross located in the search query window itself (Figure 2, Pointer 2).
Creating a claim
To create a claim, click the “Add” button (Figure 1, Pointer 2). This will open the “Add Claim” window, which consists of 4 information blocks.
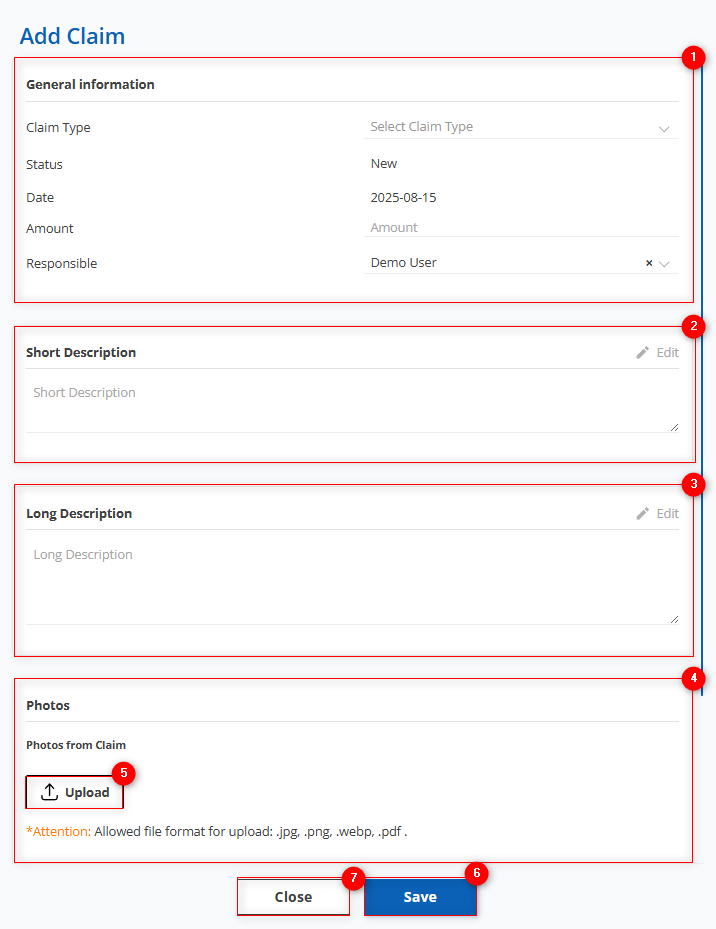
Figure 3 - The “Add Claim” window
Block “General information.” This block displays information with general details about the claim (Figure 3, Pointer 1):
-
“Claim type” - from the dropdown list that opens when you click the
 button, select the required claim type;
 -
“Status” - shows the current status of the claim;
-
“Date” - shows the creation date of the claim;
-
“Amount” - specify the amount for the compensation of the damage;
-
“Responsible” - from the dropdown list, select the persons responsible for handling this claim;
Note: The fields “Status” and “Date” are automatically filled upon claim creation with the value “New” and the current date.
Block “Short Description” is used for a concise summary of the damage compensation claims for the specific deal. (Figure 3, Pointer 2).
Block “Long Description” This block is used for a complete and detailed account of the claims for compensation of the damage in this deal. (Figure 3, Pointer 3).
Block “Photos.” (Figure 3, Pointer 4). In this block you can upload photos of the vehicle for which the claim is prepared by clicking the ![]() button (Figure 3, Pointer 5).
button (Figure 3, Pointer 5).
To save changes, click the “Save” button (Figure 3, Pointer 6). To close the window, use the “Close” button (Figure 3, Pointer 7).
Editing a claim
To edit a claim, select the required record in the table and click the ![]() button (Figure 1, Pointer 3). This will open the “Edit Claim” window, which includes six blocks: "General information", "Deal information", "Short Description", "Long Description", "Photos", and "Claim Solution" (Figures 4 and 5). To make fields editable, click the "Edit" button (Figure 4, Pointer 1); then you will be able to modify the data in the same way as when it was initially created.
button (Figure 1, Pointer 3). This will open the “Edit Claim” window, which includes six blocks: "General information", "Deal information", "Short Description", "Long Description", "Photos", and "Claim Solution" (Figures 4 and 5). To make fields editable, click the "Edit" button (Figure 4, Pointer 1); then you will be able to modify the data in the same way as when it was initially created.
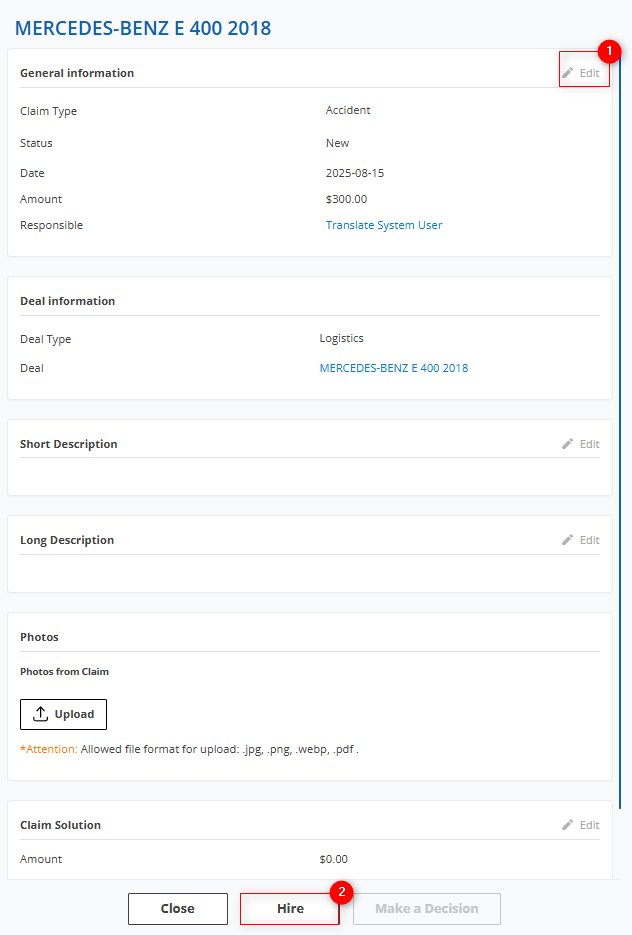
Figure 4 - The “Edit claims” window
Block General information: Contains general information about the claim.
Note: When you click the “Responsible”, a window with information about the responsible employee will open.
Block Deal information: On the "Deal information" tab, there is information about the deal type for which the claim is being filed, as well as the deal itself; clicking it opens a window with its detailed information.
Clicking the deal name will open a window with full information about it, provided that the claim type is “Accident”; for other claim types this is not displayed.
Note: This field cannot be edited; it is automatically filled when a deal is selected.
Block Short Description: Contains a short description of the claim regarding the damage in this deal.
Block Long Description: Contains a complete and detailed description of the claim regarding the damage in this deal.
Block Photos: In this block you can upload new photos or delete existing ones.
Block Claim Solution: Contains information about the amount of damage and a description of the decision regarding this claim, which is made by the responsible employee. When working with a new claim, click the “Hire” button (Figure 4, Pointer 2), the claim status will automatically change to “Open,” meaning the claim has been taken for processing. To make a decision, open the claim that is in progress and specify the amount of damage. After that, the “Make a decision” button will become available (Figure 5, Pointer 1). When you click this button, the claim status automatically changes to “Closed” and the dispute is resolved. To delete a claim, click the “Delete claim” button (Figure 5, Pointer 2). To save changes, click “Save”; to exit the editing form, use the “Cancel” button.

Figure 5 - Continuation of the “Edit Claim” window
After saving, the claim will appear in the table (Figure 1), from where you can conveniently access related data:
For example, clicking the Responsible person (Figure 1, Pointer 4) will open the employee window with their deals, companies, accounts, and other information.
Clicking the deal name (Figure 1, Pointer 5) will open the deal window with full information about the deal, providing the ability to add or edit data.
Mass Edit Customers
The mass edit claims function provides a convenient way to simultaneously update specified fields across several records when needed.
To use this function, follow these steps:
-
In the table, place a checkmark
 next to each claim you want to edit (Figure 1, Pointer 6).
 -
After selecting the items, a panel with mass edit options will appear at the bottom of the table. Use the available options to change the parameters (Figure 1, Pointer 7).
Note: If you check “Select all” (Figure 1, Pointer 8), all claims will be selected, and changes can be applied to all at once.
Available options:
-
Set Responsible: choose the option “Set responsible” (Figure 6, Pointer 1), then select the required employee from the available options and click the “Apply” button (Figure 6, Pointer 2) to save the changes.
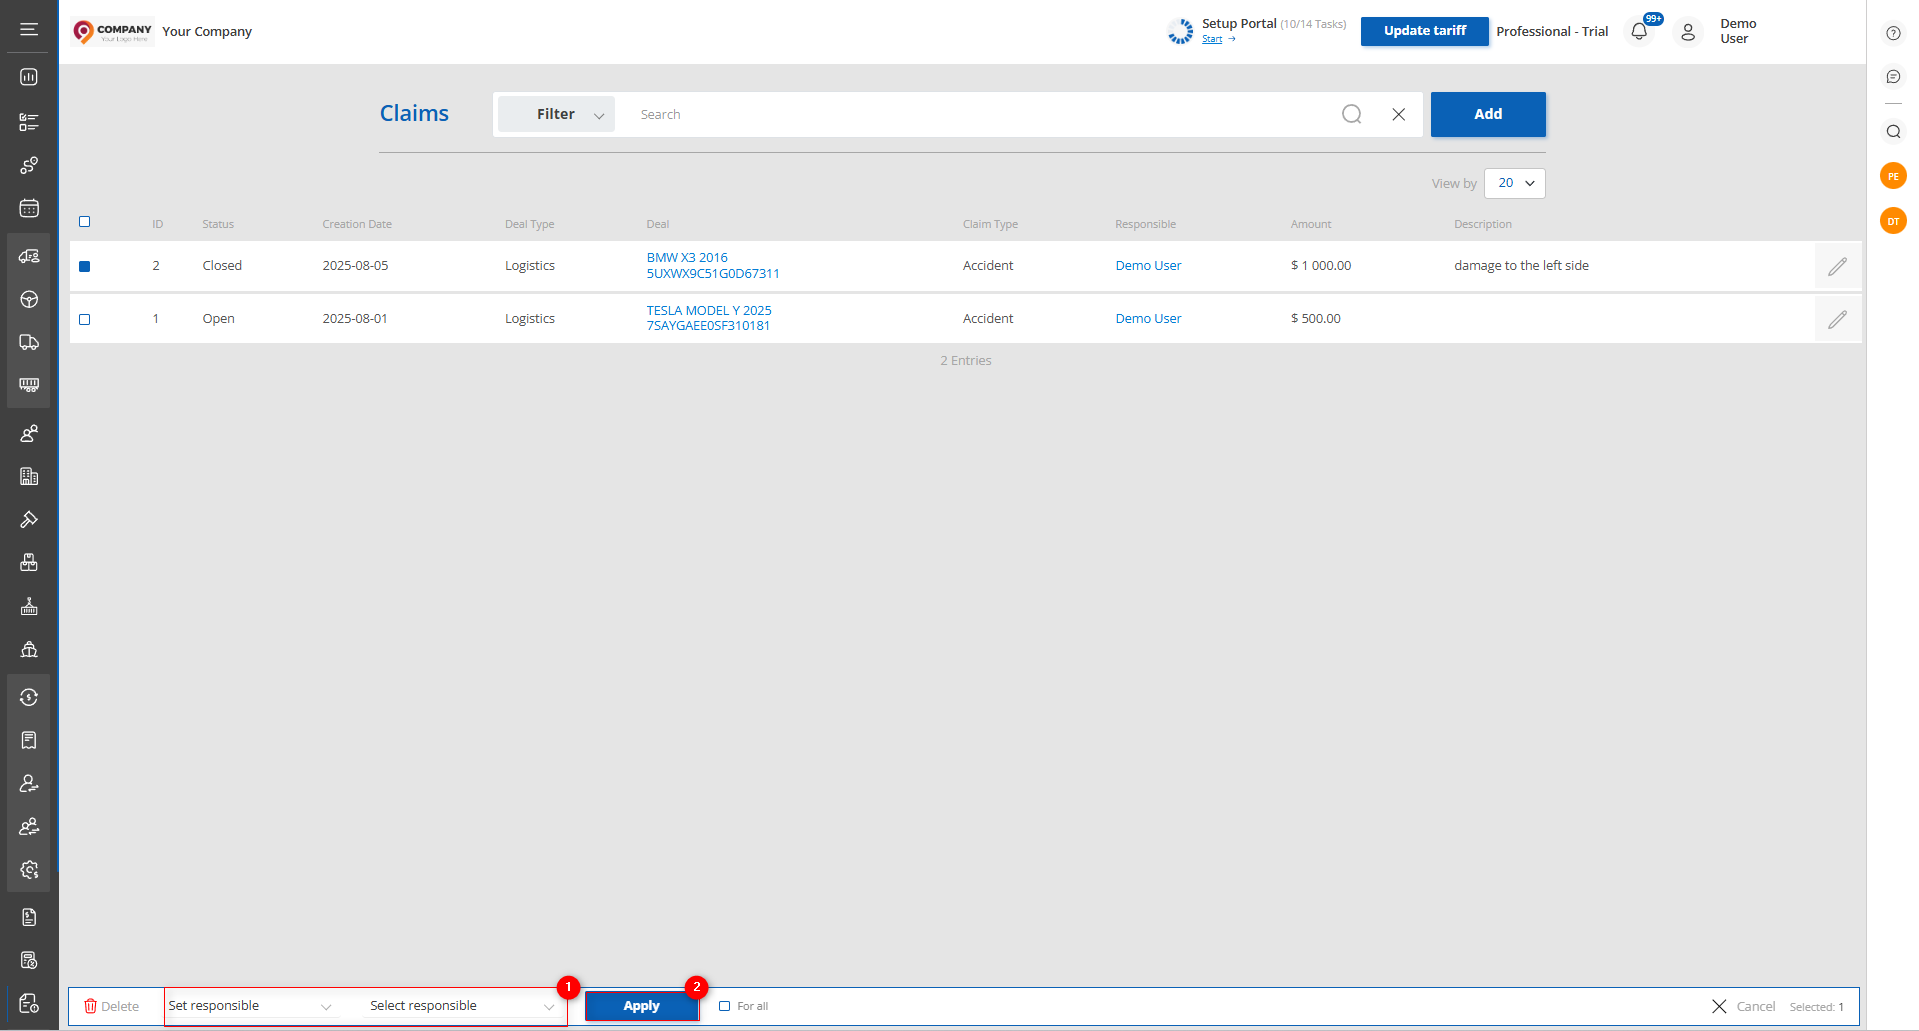
Figure 6 - Option to set the responsible person
-
Set Status: select the option “Set status” (Figure 7, Pointer 1), then choose the desired status from the available options and click “Apply” (Figure 7, Pointer 2) to save the changes.

Figure 7 - Option to set the status
Created claims are displayed on the lot page (Figure 8, Pointer 1) and also in the deal form (Figure 9, Pointer 1), where you can view, create, and edit claims. To create a claim, click the “Add claim” button and repeat the steps described above for creating a claim.
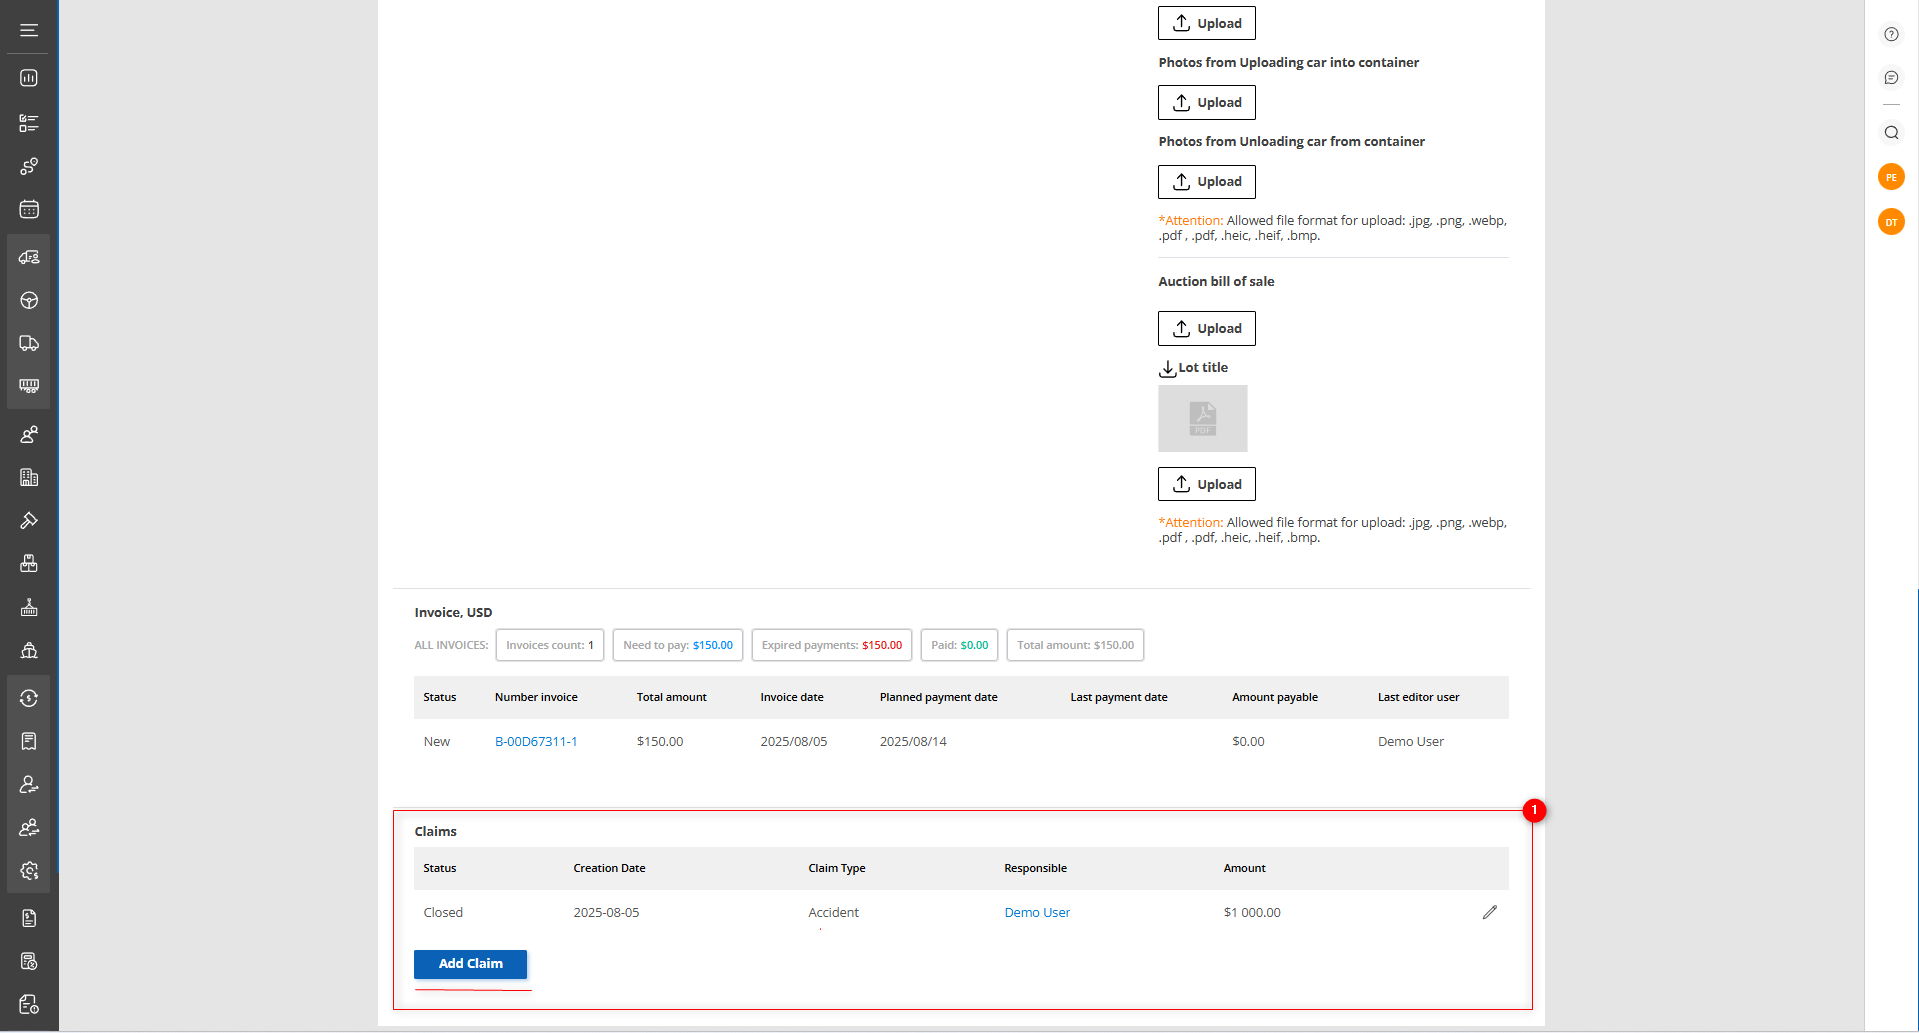
Figure 8 - Site page“View Lot”
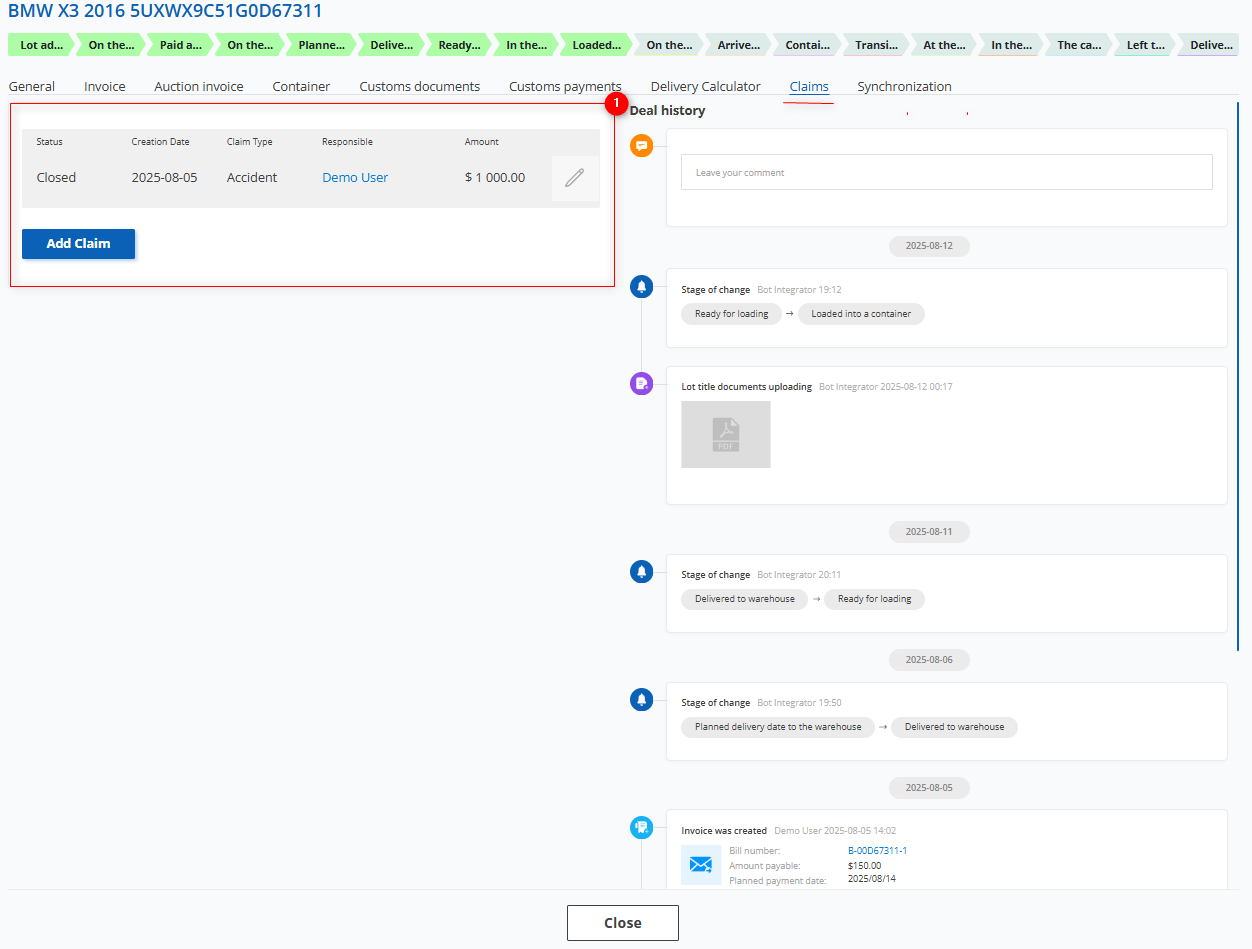
Figure 9 - Site page “Edit Lot”