


Logiline| Logistic CRM system - How to create a container?
To create a container, go to the menu section and select the “Warehouses” tab.
To create a container, navigate to the “Warehouses” menu section, then select the desired record in the table by checking the box ![]() (Figure 1, Pointer 1), and click the “Create Container” button (Figure 1, Pointer 2). This will open the “Container” window (Figure 2), where you can create a container with the selected vehicles.
(Figure 1, Pointer 1), and click the “Create Container” button (Figure 1, Pointer 2). This will open the “Container” window (Figure 2), where you can create a container with the selected vehicles.
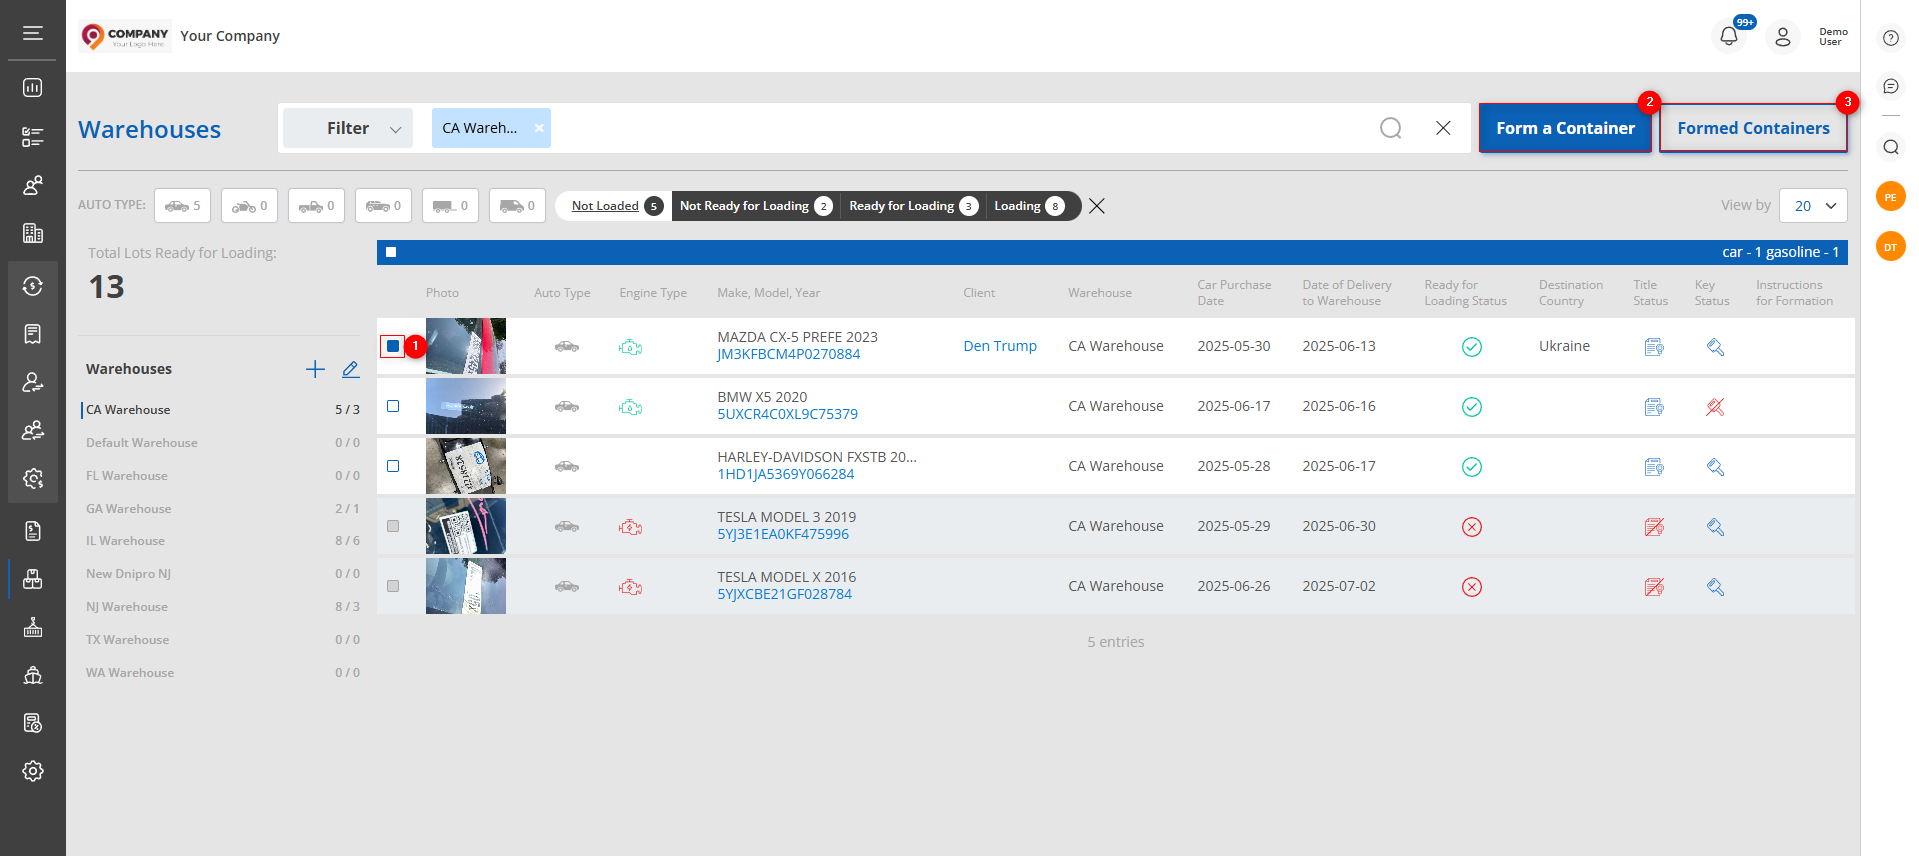
Figure 1 – “Warehouses” Page
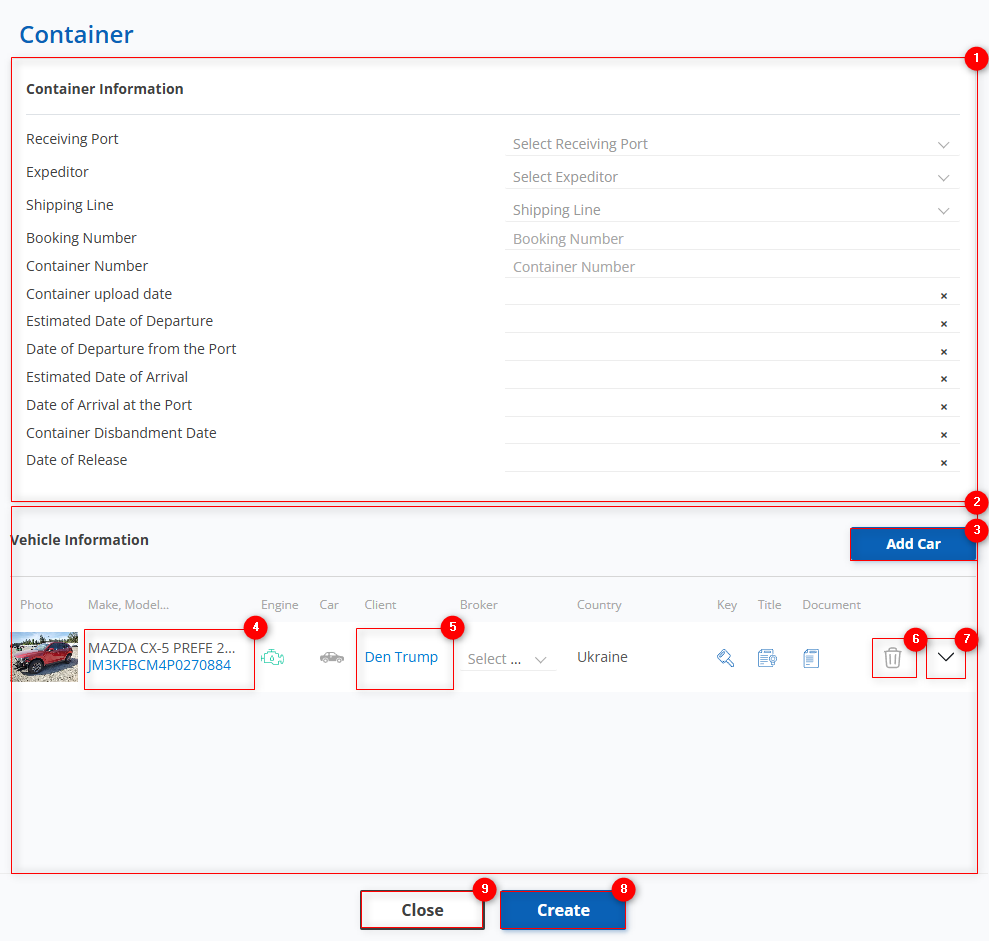
Figure 2 – “Container” Window
The “Container” window consists of two sections: “Container Information” and “Vehicle Information.”
Container Information Section
To form a container, depending on the logistics process stage, fill in the following fields (Figure 2, Pointer 1):
-
“Receiving Port” – from the dropdown list that opens by clicking the button
 , select the port of arrival;
 -
“Expeditor” – select the forwarder responsible for this container from the dropdown list;
-
“Shipping Line” – the shipping company transporting the container;
-
“Booking Number” – enter the booking number used to track the container status later;
-
“Container Number” – enter the required container number;
-
“Container Upload Date” – click the empty field to select the specific loading date;
-
“Estimated Date of Departure” – click the empty field to select the estimated departure date;
-
“Date of Departure from the Port ” – specify the actual departure date from the port;
-
“Estimated Date of Arrival” – click the empty field to select the estimated arrival date;
-
“Date of Arrival at the Port” – select the actual container arrival date at the port;
-
“Container Disbandment Date” – specify the date when the container was dismantled;
-
“Date of Release” – click the empty field to select the specific cargo exit date from the port.
To add vehicles to the container, click the “Add Car” button (Figure 2, Pointer 3). A window will open listing vehicles available for loading at the selected warehouse. In the opened window, check ![]() the desired vehicles and confirm by clicking the “Add Car” button. To cancel, click “Close.”
the desired vehicles and confirm by clicking the “Add Car” button. To cancel, click “Close.”
The added vehicles will be displayed in the “Vehicle Information” section (Figure 2, Pointer 2).
Vehicle Information Section
The table displays information about each vehicle added to the container. Below is the full information for each vehicle included in the container:
-
“Photo”;
-
“Make, Model, Year, VIN” – clicking the VIN in the table (Figure 2, Pointer 4) opens the lot view page containing detailed information about the selected vehicle (see “Viewing a Lot” description);
-
“Engine Type” – information about the vehicle’s engine type;
-
“Car Type” – information about the vehicle type;
-
“Client” – clicking the client’s name (Figure 2, Pointer 5) opens a window with full client information where you can make necessary changes (see “Clients” page description);
-
“Broker” – select the broker from the dropdown list opened by clicking the button
 ;
; -
“Country” – destination country where the vehicle should be delivered;
-
“Key” – information about the availability of vehicle keys;
-
“Client Documents” – information about uploaded documents for the vehicle.
Note: Only the fields “Broker” and “Formation Instructions” are editable.
Clicking the button ![]() (Figure 2, Pointer 7) at the bottom of the row opens a block with the same fields listed above, as well as additional sections: “Customs Documents” (Figure 3, Pointer 1), “Customs Payments” (Figure 3, Pointer 2), and “Photos from Port destination” (Figure 3, Pointer 3).
(Figure 2, Pointer 7) at the bottom of the row opens a block with the same fields listed above, as well as additional sections: “Customs Documents” (Figure 3, Pointer 1), “Customs Payments” (Figure 3, Pointer 2), and “Photos from Port destination” (Figure 3, Pointer 3).
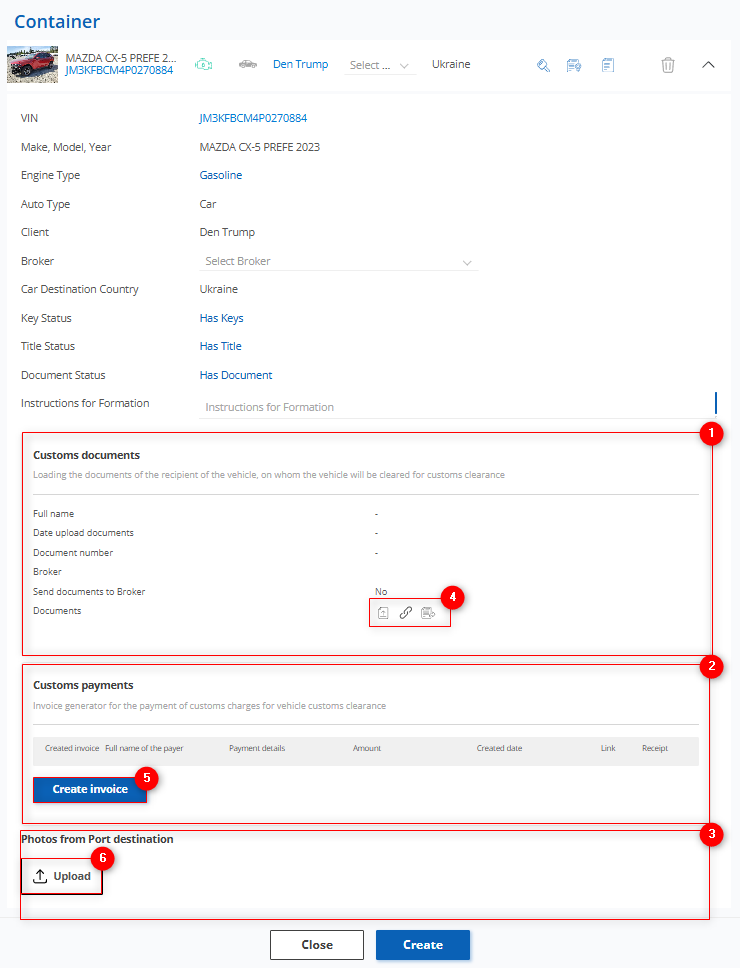
Figure 3 – “Container” Window / Vehicle Information
In the “Customs Documents” section, clicking the buttons ![]() (Figure 3, Pointer 4) opens windows for uploading and submitting customs documents (see “Uploading Customs Documents” description).
(Figure 3, Pointer 4) opens windows for uploading and submitting customs documents (see “Uploading Customs Documents” description).
In the “Customs Payments” section, you can generate an invoice by clicking the “Create Invoice” button (Figure 3, Pointer 5). This opens the “Customs Payments” window, where you need to fill in the amount, select payment details, and specify the client’s first and last name (see “Customs Expense Invoice Generator” description).
In the “Photos from Port destination ” section, you can upload photos of the vehicle that arrived at the port. To do this, click the “Upload” button (Figure 3, Pointer 6).
Clicking the button ![]() (Figure 2, Pointer 6) will open the vehicle removal window from the container (Figure 4), where you must click “Yes” to confirm deletion or “No” to cancel.
(Figure 2, Pointer 6) will open the vehicle removal window from the container (Figure 4), where you must click “Yes” to confirm deletion or “No” to cancel.
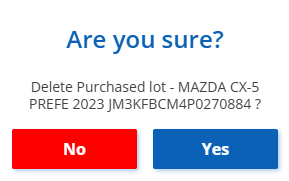
Figure 4 – Vehicle Removal Window
After filling in the required fields and adding vehicles, click the “Create” button (Figure 2, Pointer 8) to form the container or the “Close” button (Figure 2, Pointer 9) to cancel.
Note: You can also create a new container when creating a new deal (see “How to Create a Deal” description).
To access the list of already formed containers, you can do so in two ways:
-
On the “Warehouses” page, click the “Formed Containers” button to be redirected to the “Containers” page where you can view existing containers (Figure 1, Pointer 3);
-
Navigate to the “Containers” tab in the menu section, where information and viewing of already formed containers is available.