


Logiline| Logistic CRM system - Site page "Terminals"
To open the Terminals page on the site, go to the Settings menu and select the "Terminals" tab (Figure 1, Pointer 1). You will then be redirected to the Terminals Management page where you can create, edit, and delete terminals as you see fit. A search bar will also be available on this page. To search, enter the terminal name or country and click the ![]() button , to reset the search click on the
button , to reset the search click on the ![]() button .
button .
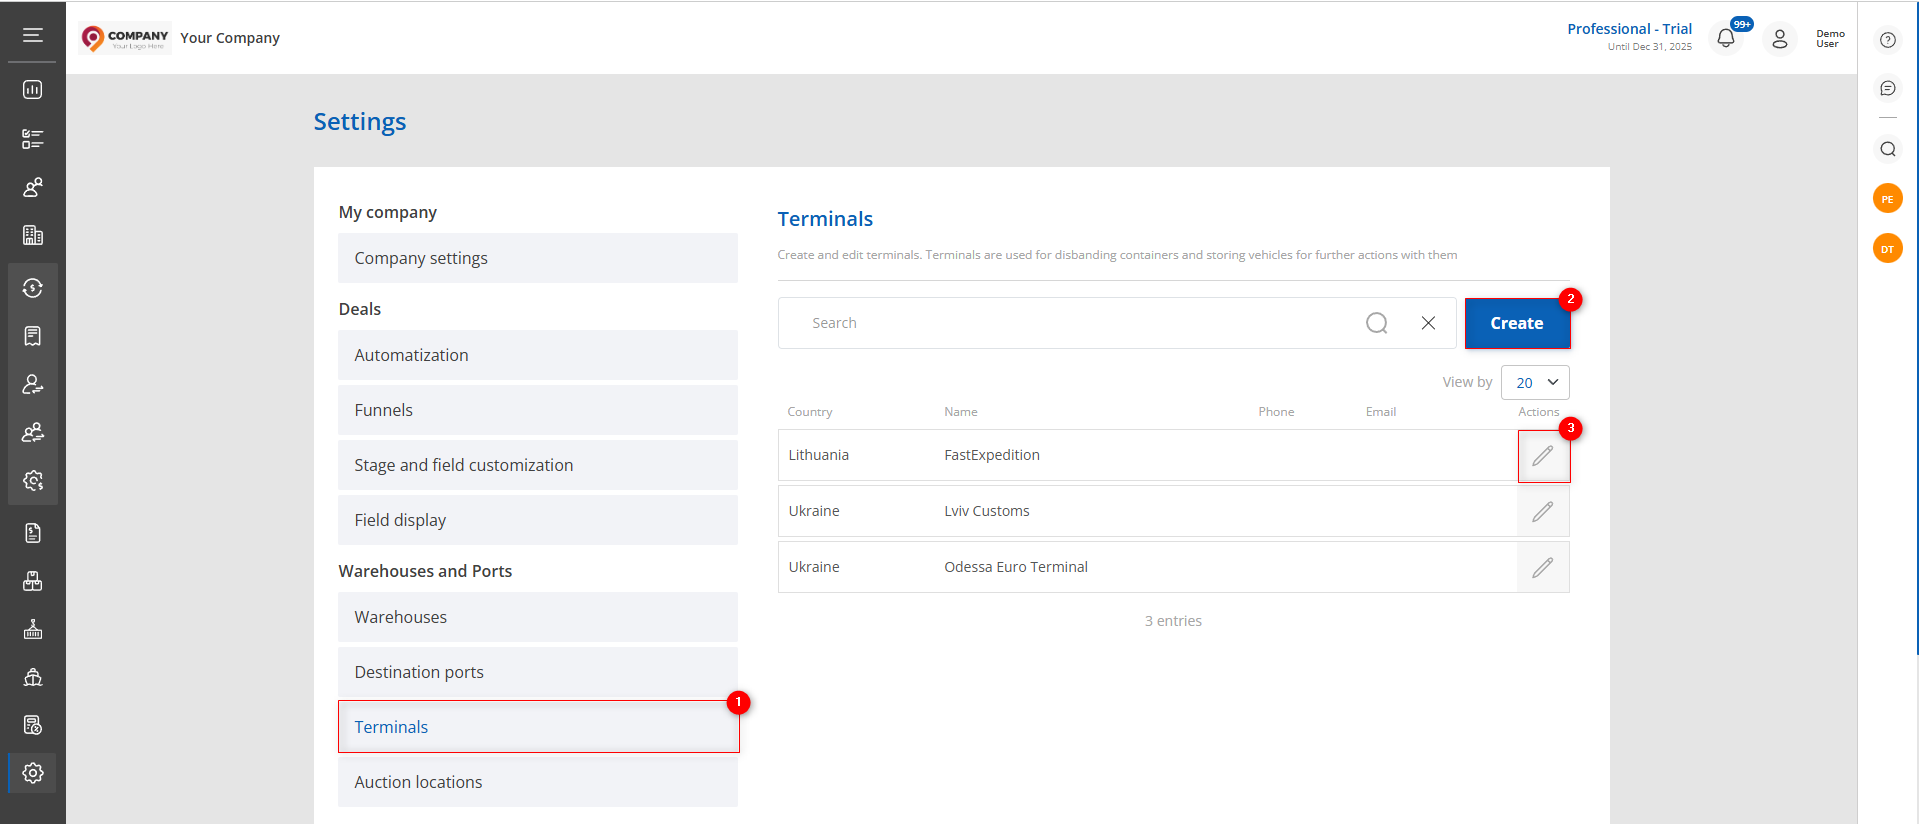 Figure 1 - "Terminals" site page
Adding a terminal
To add a new terminal to which the vehicle will be delivered, click the “Create” button (Figure 1, Pointer 2). This will open the “Terminals” window, which consists of two information blocks:
- General Information Block (Figure 2, Pointer 1). This block displays general details about the terminal:
- “Name” – enter the name of the terminal;
- “Responsible” – from the dropdown list that opens by clicking the
 button, select the employee responsible for managing logistics related to this terminal;
 - “Company” – specify the organization handling or supporting vehicle processing at the terminal;
- “Phone” – enter the contact number;
- “Email” – provide the terminal’s email address;
- “Website” – enter the terminal’s web address.
- Terminal Address Block (Figure 2, Pointer 2). This block contains the terminal’s location and contact details:
- “Address 1” – enter the primary address;
- “Address 2” – add a secondary address if needed;
- “Country” – indicate the country where the terminal is located;
- “City” – enter the city;
- “State” – specify the state or region;
- “ZIP Code” – enter the ZIP/postal code.
Note: The required fields are “Name”, “Country” and “City”.
Click “Save” to store the data, or “Close” to cancel. The created terminal will then appear in the table.
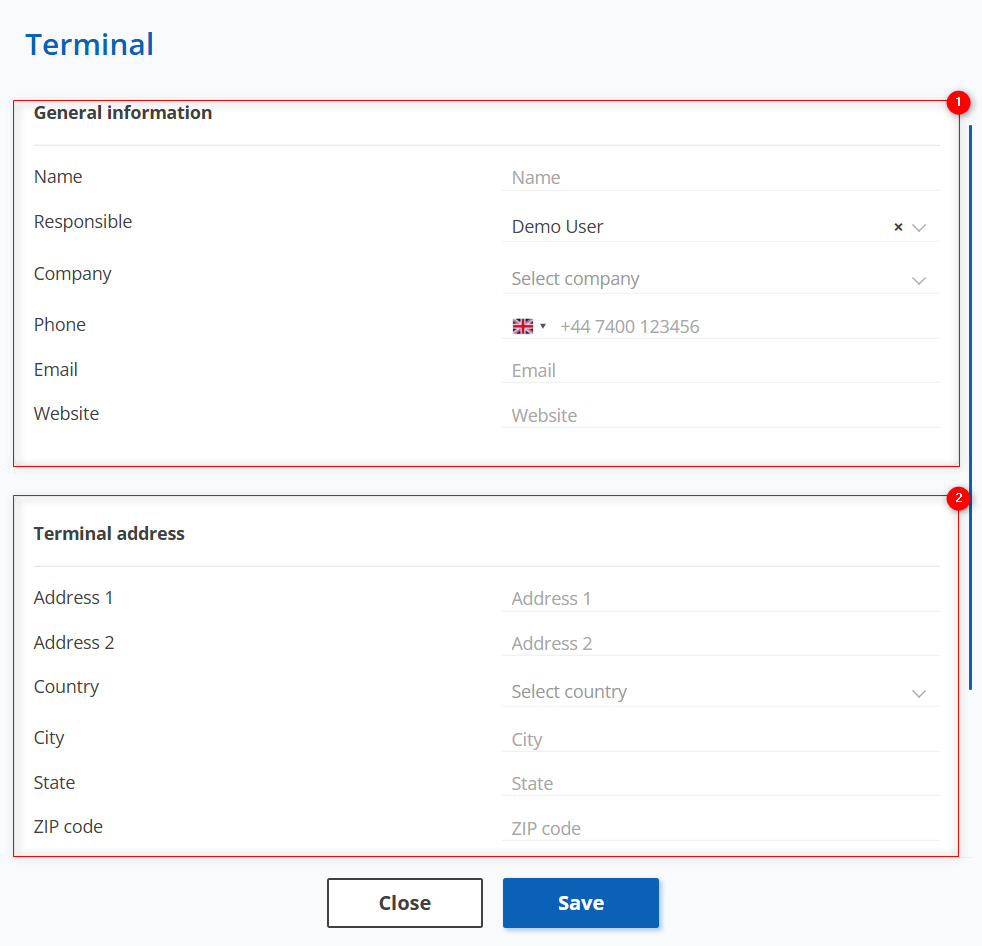 Figure 2 - "Terminals" window
Editing a terminal
To edit the data, click on the ![]() button located on the right side of the table entry (Figure 1, Pointer 3). This will open the "Terminal" window, where you can click on the "Edit" button to edit the data (Figure 3, Pointer 1). The editing process is similar to creating a new entry, but during editing, an additional block titled “Contact Person” appears.
button located on the right side of the table entry (Figure 1, Pointer 3). This will open the "Terminal" window, where you can click on the "Edit" button to edit the data (Figure 3, Pointer 1). The editing process is similar to creating a new entry, but during editing, an additional block titled “Contact Person” appears.
This block displays the details of the responsible employee who can be contacted regarding logistics. To add a contact person, click the “Add contact” button (Figure 3, Pointer 2), which opens a window where you can fill in the first name, last name, position, phone, and email. If necessary, you can also add a comment in the “Note” field. After completing the form, click “Save”, the created port will then be displayed in the table (Figure 3, Pointer 3).
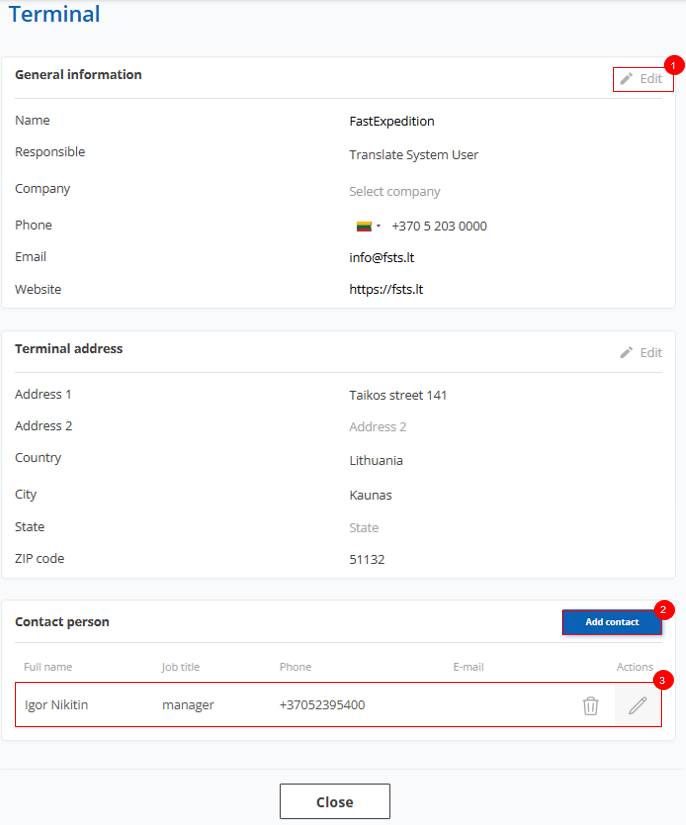 Figure 3 - Editing the "Terminals" window