


Logiline| Logistic CRM system - How to set an individual price list for a client or assign service costs?
You can assign a custom price list to a client in two ways: either during the client creation process or later through the editing mode after the client has been created.
When adding a client, the price list settings section is located at the bottom of the form. To assign a price list, click the button and select the desired option from the dropdown menu (Figure 1, Pointer 1).
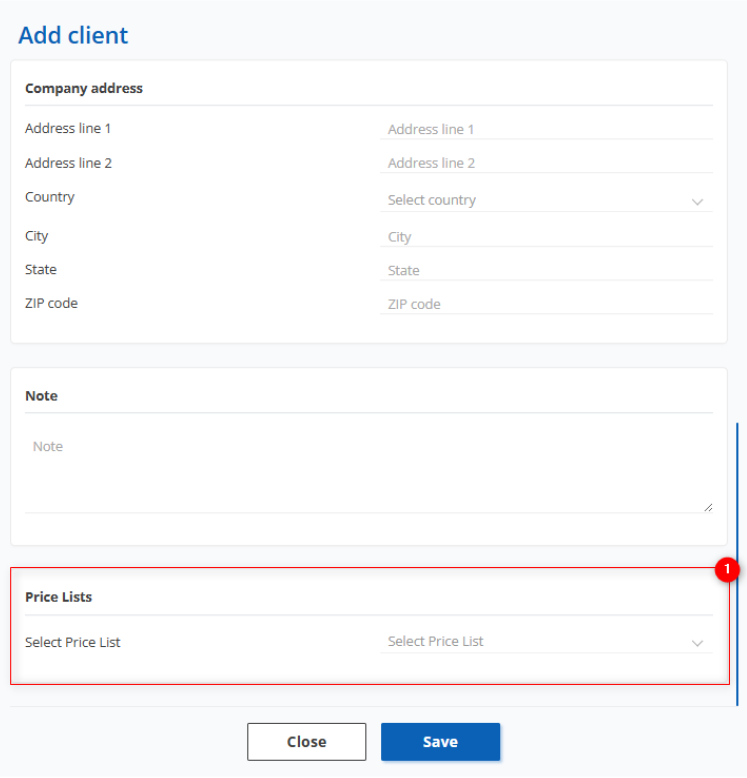
Figure 1 – Creating a Client
When editing a client, this can be done in the “Invoices Settings” tab (Figure 2, Pointer 1). This section is intended for configuring the price list, products, and services.
To assign a price list, click the “Edit” button (Figure 2, Pointer 2), and from the dropdown menu that appears, select the appropriate price list for the client.
To add a product, click the “Add line” button (Figure 2, Pointer 3), then choose a product from the dropdown list, set a price, and define its active status.
To remove a product, click the delete icon. To save the product list, click the “Save” button (Figure 2, Pointer 4).
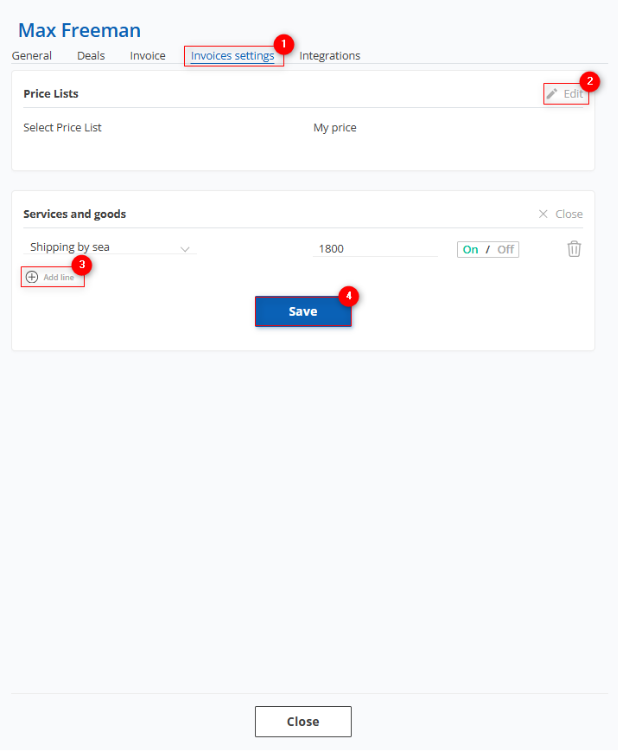
Figure 2 – “Client” Window / Invoices Settings
Once an individual price is set for the client, it will be applied when calculating delivery costs in the deal modal window. If the client has a set price for a product that matches an item in the price list and the product is active, the client-specific price will be used. If the product is deactivated or not present in the client's settings, the general price list will be applied.