


Logiline| Logistic CRM system - Site page "Auction Account"
To set up synchronization with auctions, go to the "Settings" section and select the "Auction Account" tab. You will then be redirected to the account management page, where you can create, edit, or delete an auction account.
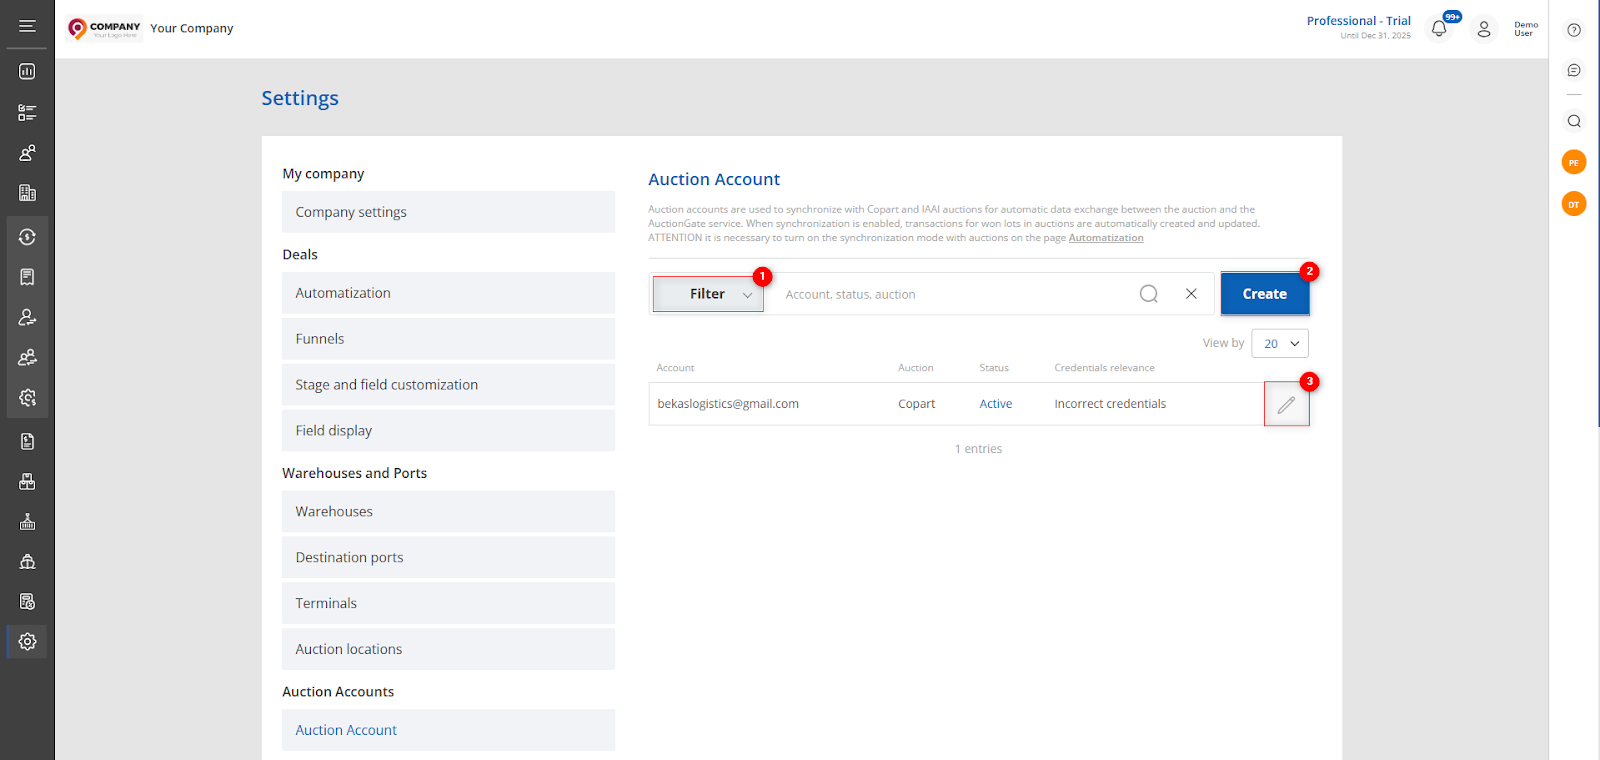 Figure 1 – “Auction Account” Page
This page also features a search bar that allows you to search by account, auction, and activity status. To perform a search, enter any query and click the ![]() button located in the search bar or press the Enter key on your keyboard. The matching records based on the entered criteria will be displayed in the table.
button located in the search bar or press the Enter key on your keyboard. The matching records based on the entered criteria will be displayed in the table.
To clear the entire search field and reset the filter, click the ![]() button. To remove a single parameter, click the cross located within the search query field.
button. To remove a single parameter, click the cross located within the search query field.
When you click the “Filter” button (Figure 1, Pointer 1), the filter window will open, allowing you to set search parameters (Figure 2):
-
“Account” – enter the account name;
-
“Select Status” – from the dropdown list that appears when you click the
 button, choose the account’s activity status;
 -
“Select Auction” – choose the auction from the dropdown list.
Note: You can use one or multiple parameters to perform the search.
After setting the parameters, click the “Search” button, or click “Reset” to cancel.
 Figure 2 – “Filter” Window
To add an auction, click the “Create” button (Figure 1, Pointer 2). Then, in the window that appears, enter your auction authorization details by filling out the following fields:
-
“Select status synchronization” – select the status;
-
“Responsible”– choose the person who will be assigned responsibility for deals after synchronization with the account;
-
“Client” – select the client to whom deals will be automatically assigned after synchronization;
-
“Select auction” – specify the auction where the deals take place;
-
“Buyer Number” – enter your number at this auction;
-
“Login” – enter your login for auction access;
-
“Password” – enter your password;
-
“Confirm Password” – re-enter the password;
-
“Note” – add a note if necessary.
After filling out all fields, click “Save” to save the changes. To cancel the creation, click “Cancel”.
To edit an account, select the desired entry in the table and click the button. This will open a window where you need to click the “Edit” button (Figure 3, Pointer 1) to modify the data. The process of making changes is similar to creating a new entry, but when editing, an additional “Test account credentials” button appears (Figure 3, Pointer 2).
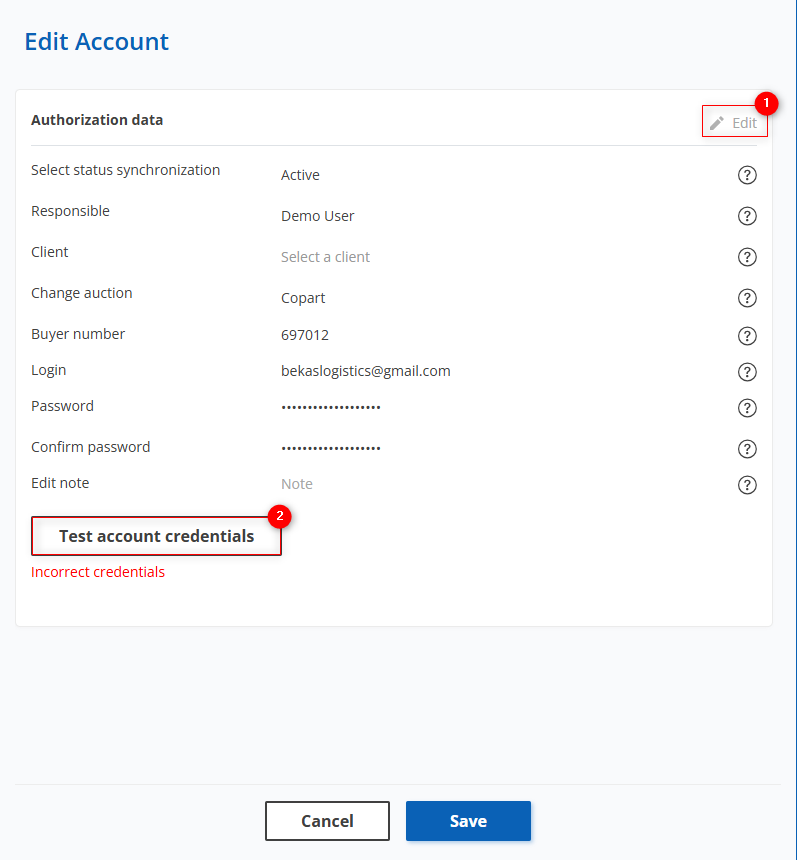
Figure 3 – “Edit Account” Window
By clicking this button, a verification of the account's existence on the corresponding auction will be performed. If the provided data is incorrect and the account is not found, a message will appear: “Incorrect credentials”