


Logiline| Logistic CRM system - Site page "Employees"
To manage employees, go to the “Settings” page and open the “Employees” section. You will then be redirected to a page where you can create, edit, or delete an employee account.
To create a new employee, click the “Create” button (Figure 1, Pointer 1).
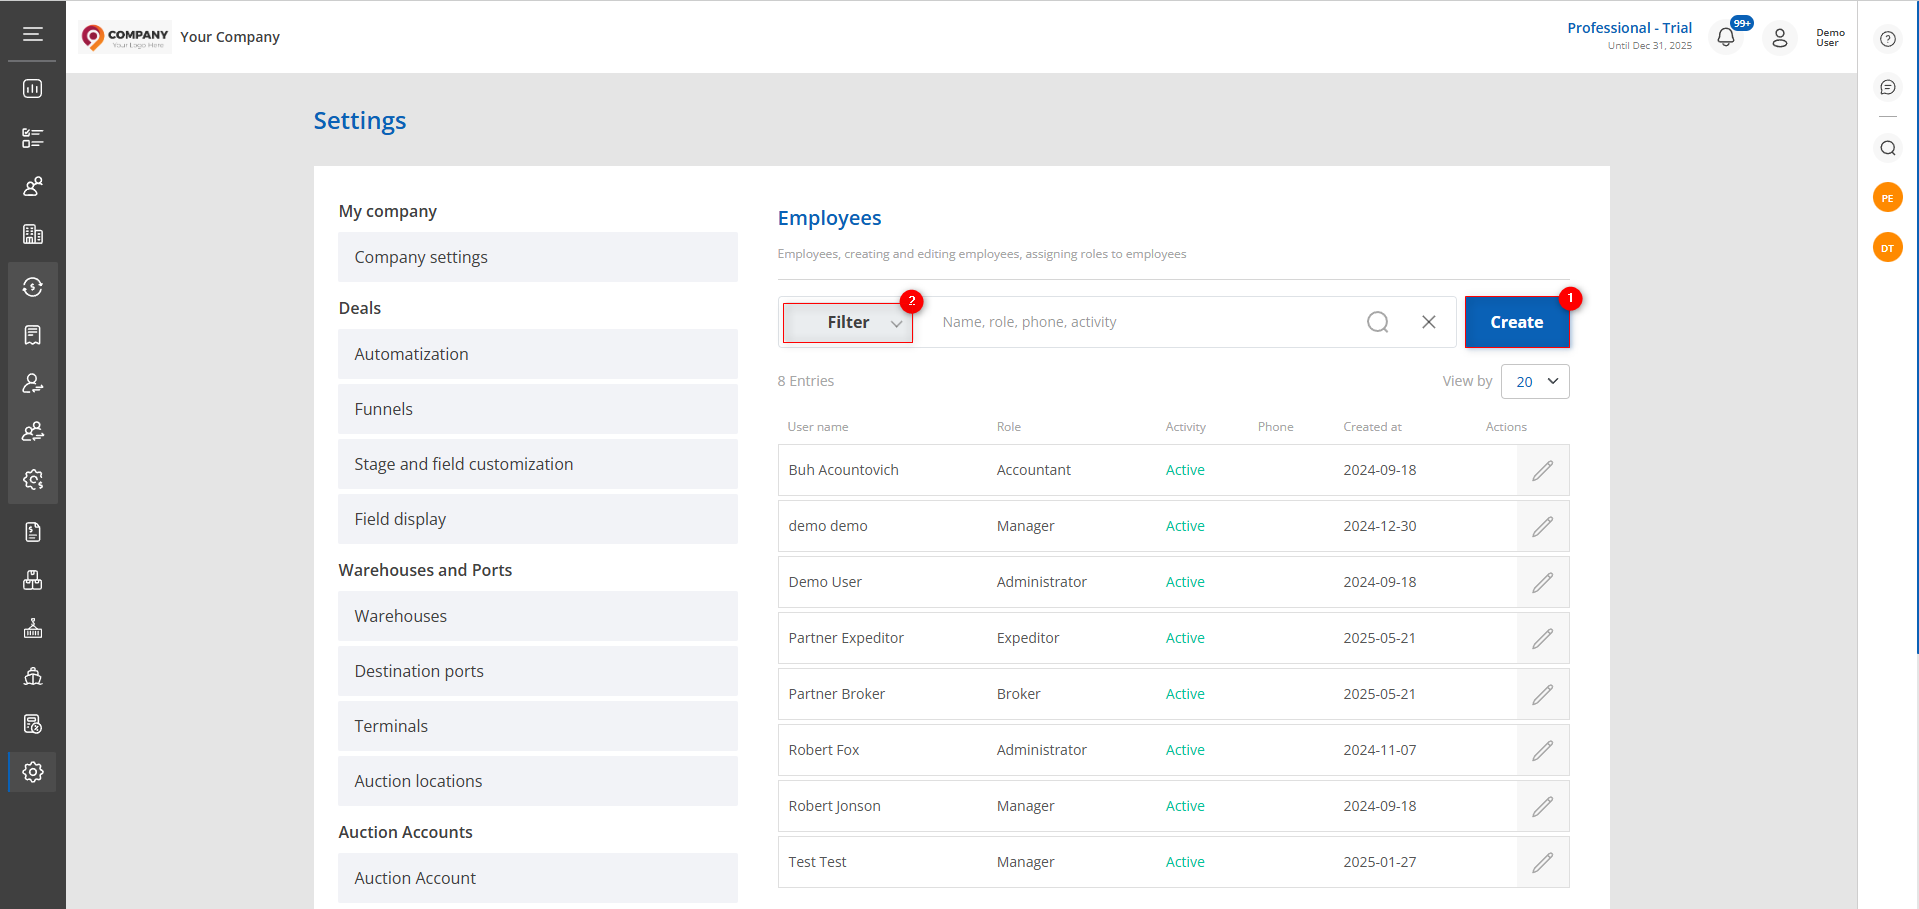
Figure 1 — Site page “Employees”
This will open the “Add Employee” window (Figure 2), where you need to fill in the main parameters of the new user.
Fill in the required fields:
-
Status — specify whether the user is currently active;
-
Employee Type — select whether the employee is internal (e.g., a full-time staff member) or external (e.g., a partner). If you are adding an internal employee of your company, choose the corresponding user type. In this case, the company binding field will not be displayed;
-
Company — specify the organization to which the employee belongs;
-
Personal Data — enter the employee’s first name, last name, email address, and phone number;
-
Telegram Nickname — provide if needed for prompt communication;
-
Employee Role — select from the available roles the one that corresponds to the user’s functions in the system.
Note: The system includes predefined basic roles such as Manager, Accountant, Administrator, Broker, Forwarder, and Warehouse. If necessary, roles can be created and edited in the "Roles and Permissions" section.
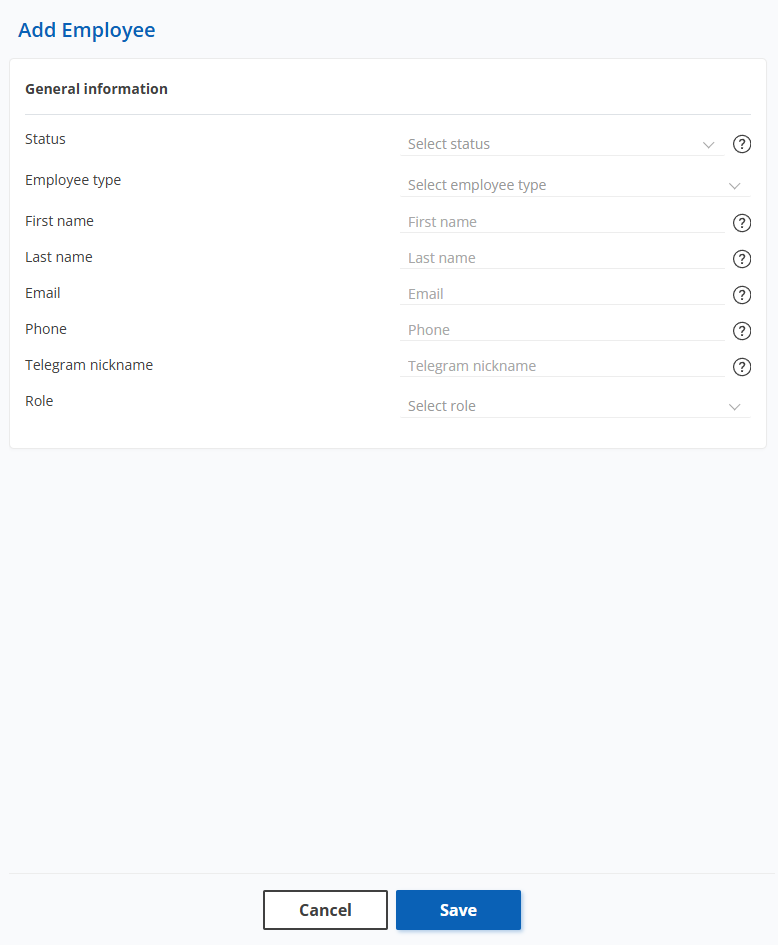
Figure 2 – “Add Employee” Window
After filling in all the fields, click the “Save” button. An email with a registration link will be sent to the employee’s specified email address. By following the link, the employee sets their username and password and completes the system authorization.
If the email was not delivered, it can be resent. To do this, select the desired user, open their profile, and click the “Send invitation email again” button (Figure 3, Pointer 1). The system will then resend the email with the registration link.
After adding the employee, several tabs become available in their profile: “General”, “Deals”, “Clients”, “Companies” and “Invoice” (Figure 3, Pointer 2).
The “General” tab contains information displaying the employee’s personal data and role. To edit the data, click the “Edit” button (Figure 3, Pointer 3) — editing is performed the same way as during creation.
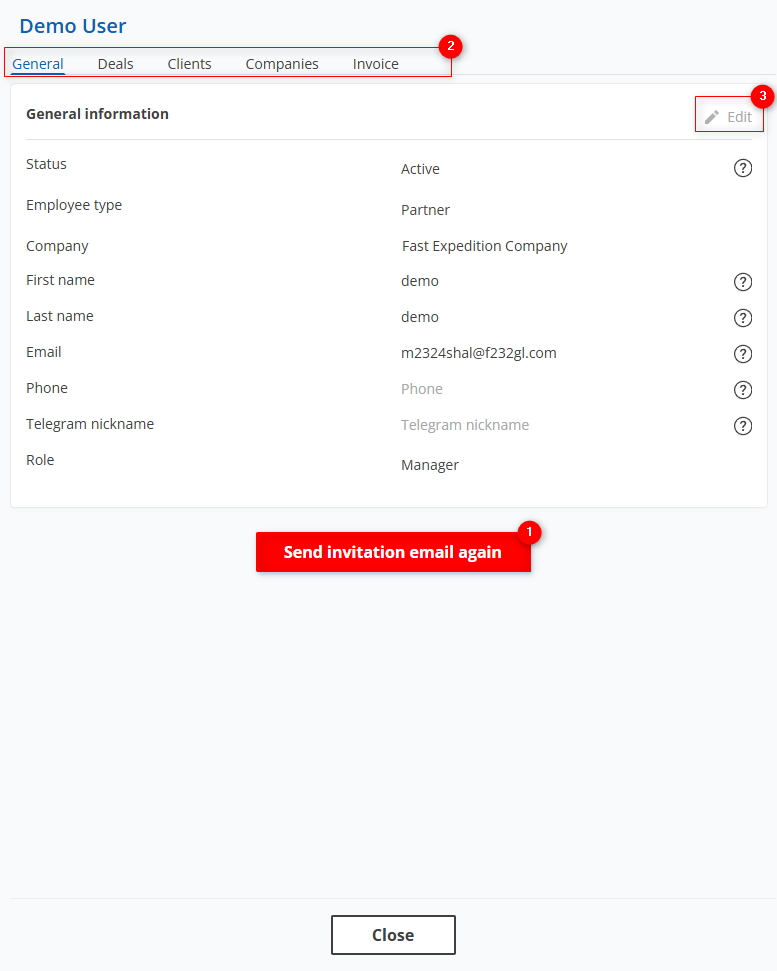
Figure 3 – Employee Window
The “Deals” tab displays all deals assigned to the employee. This information includes the current stage of the deal, as well as details such as the sale date, VIN number, make, model, and year of manufacture of the vehicle. Additionally, the warehouse where the vehicle is located is indicated.
Search can be performed by VIN, make, model, and year of manufacture of the vehicle.
Enter the required data and click on or press the “Enter” key on the keyboard. As a result, the table will display records matching the specified criteria.
To clear the entire search window and reset the filter, click the button. To remove a single parameter, click the cross located within the search field.
Clicking on a vehicle (Figure 4, Pointer 1) will open the deal window with complete information about the deal, allowing you to add or edit data.
Clicking on the warehouse (Figure 4, Pointer 2) will open a window displaying all vehicles located in that warehouse. For each vehicle, information about the current deal stage, client, and delivery date will be available.
Note: Only vehicles at the following stages will be displayed in the warehouse: Delivered to warehouse, Ready for loading, and Loading in progress.
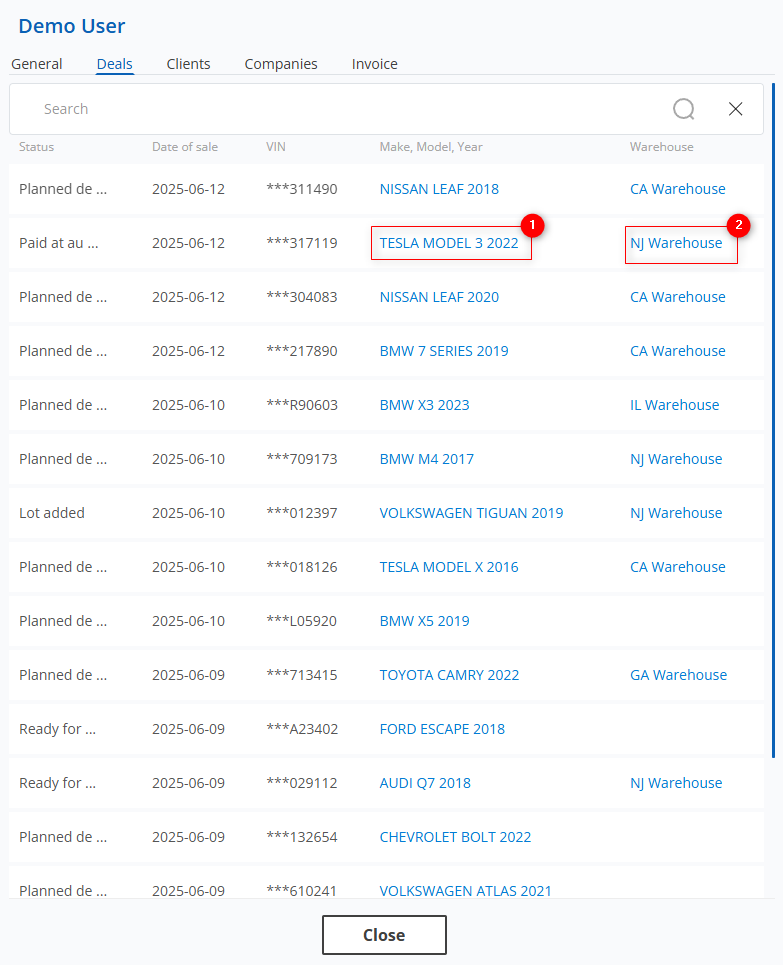
Figure 4 - Employee/Deal Window
The “Clients” tab displays the clients created by the employee or those for whom the employee is responsible. For each client, the company name, phone number, and status — active or inactive — are indicated (Figure 5).
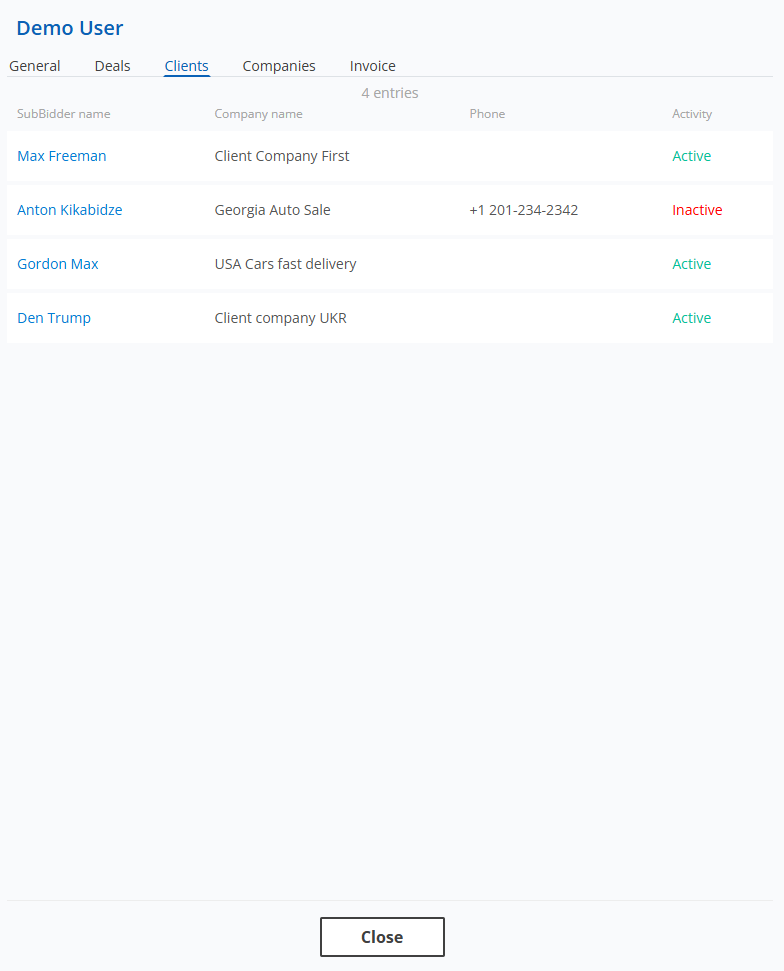
Figure 5 - Employee/Clients Window
The “Companies” tab displays a list of all organizations associated with the employee. For each company, its name, type, and phone number (if provided) are shown (Figure 6).
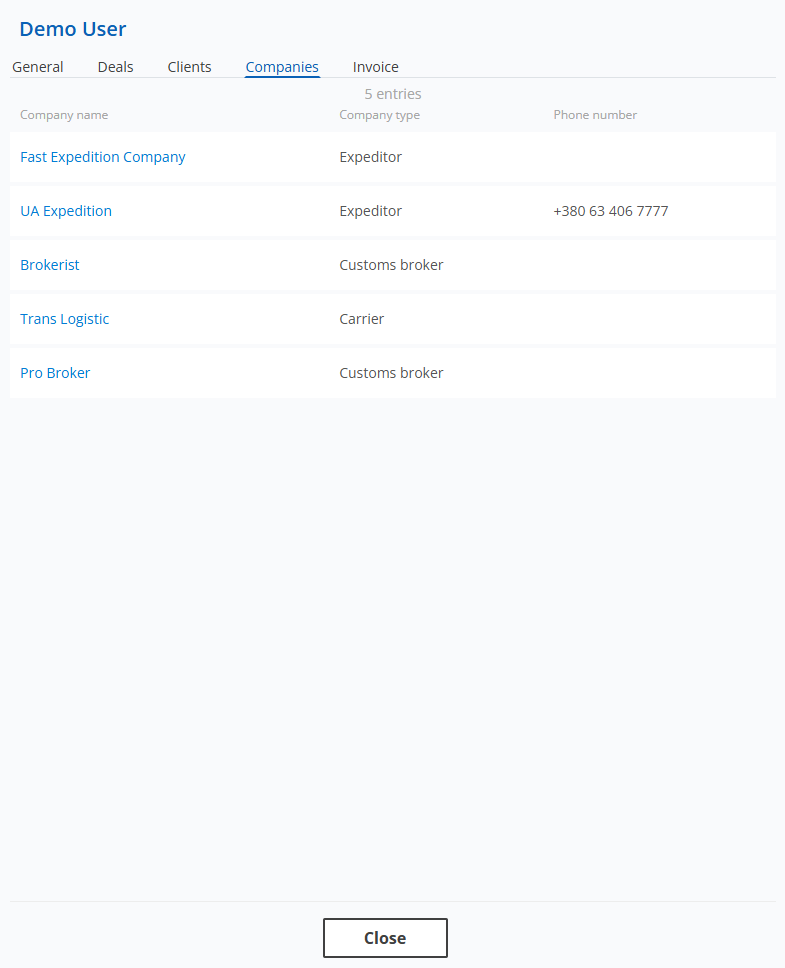
Figure 6 – Employee/Companies Window
The “Invoice” tab displays invoices issued by the employee to their clients. Clicking on the invoice number (Figure 7, Pointer 1) will open the invoice window, providing detailed information about the specific client invoice. Here, you can edit and make changes to the invoice details. For a detailed description of this page, see the website page "Invoices."
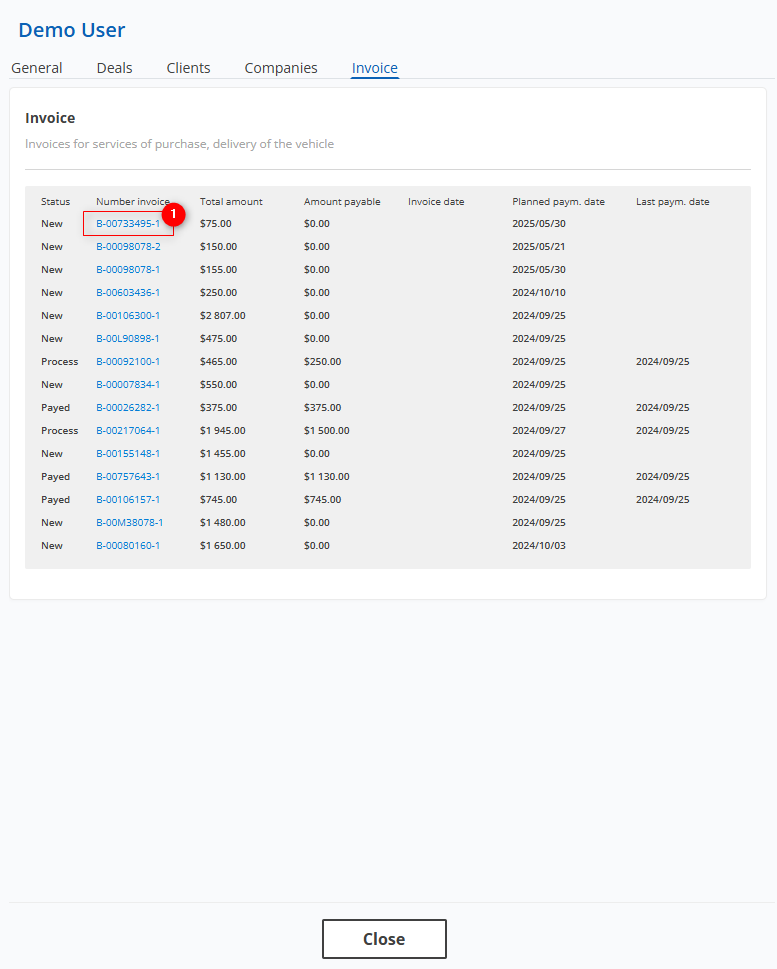
Figure 7 – Employee/Invoice Window
Also on this page, there is a search bar that allows you to search by employee, role, phone number, and activity status. To do this, enter any query and click the ![]() button located in the search bar or press the “Enter” key on the keyboard. As a result, the records matching the entered parameters will be displayed in the table.
button located in the search bar or press the “Enter” key on the keyboard. As a result, the records matching the entered parameters will be displayed in the table.
To clear the entire search window and reset the filter, click the ![]() button. To remove a single parameter, click the cross located within the search field.
button. To remove a single parameter, click the cross located within the search field.
Clicking the “Filter” button (Figure 1, Pointer 2) will open the filter window, where you can set search parameters.
Note: You can specify one or more parameters to perform the search.
After entering the parameters, click the “Search” button; to cancel, click “Reset”.