


Logiline| Logistic CRM system - How does the warehouse page work?
The “Warehouses” page is designed for managing vehicles in warehouses and forming containers.
To open the page, go to the menu section and select the “Warehouses” tab. You will then be redirected to the page where you can view vehicles in the warehouse, keep track of them, and organize them into containers.
The “Warehouses” website page features a search bar, filters based on specified parameters, and a table displaying the complete list of vehicles with all relevant information. This includes data such as photos, vehicle type, engine type, make, model, year of manufacture, VIN, status, client, availability of documents, keys, and more (Figure 1).
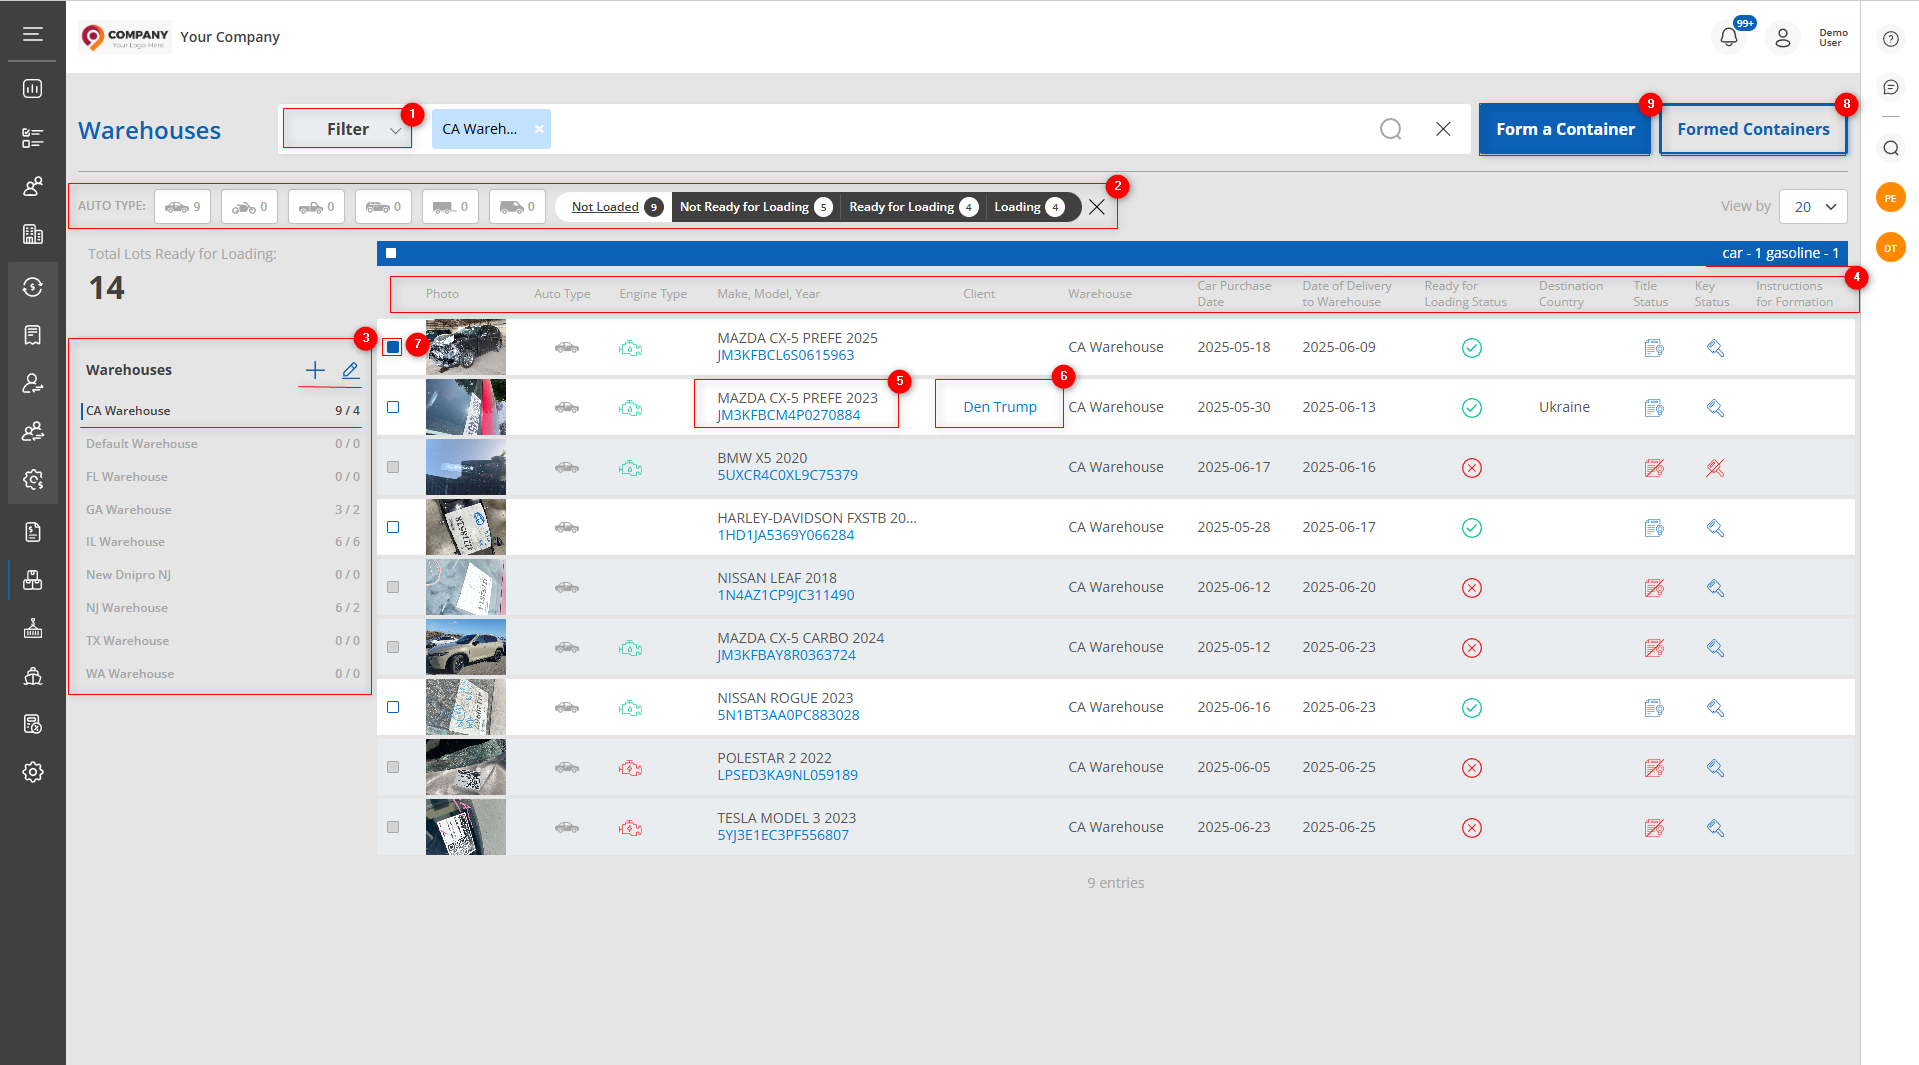
Figure 1 - “ Warehouses” page
Search
Search by specified parameters:
When you click the “Filter” button (Figure 1, Pointer 1), a filter window will open, allowing you to set search parameters (Figure 2):
-
“VIN, Make, Model, Year, Lot Number” – enter the required value;
-
“Vehicle Type” – select the vehicle type from the dropdown list that appears when you click the
 button;
 -
“Client” – select the client from the dropdown list;
-
“Key Status” – select the key status from the dropdown list;
-
“Purchase Date” – click on the empty field to choose a specific date or a date range for the search;
-
“Warehouses” – select the warehouse where the vehicle will be stored before shipment from the dropdown list;
-
“Engine Type” – select the engine type from the dropdown list;
-
“Destination Country” – select the destination country for vehicle delivery from the dropdown list;
-
“Document Status” – select the document status from the dropdown list;
-
“Arrival to Warehouse Date” – specify a specific date or date range for the vehicle’s arrival at the warehouse for the search;
Note: You can set one or multiple parameters to perform the search.
After entering the parameters, click the button. As a result, the table will display data according to the applied filter parameters.
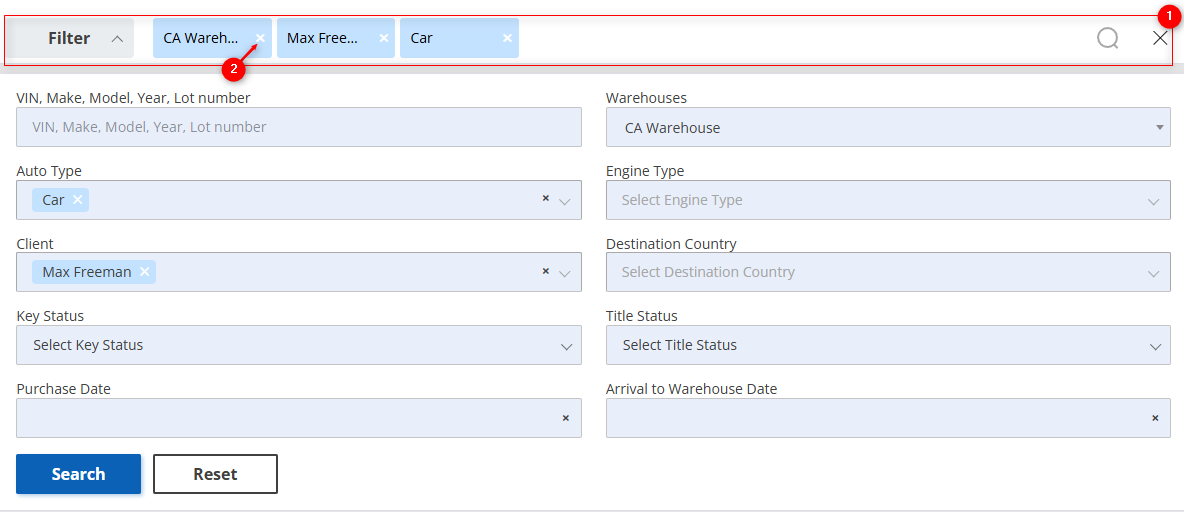
Figure 2 - “Filter” window
Search in the Search Bar:
The search bar allows you to search by any parameter (Figure 2, Pointer 1). To do this, enter any query and click the ![]() button located in the search bar or press the “Enter” key on your keyboard. As a result, records matching the entered parameters will be displayed in the table.
button located in the search bar or press the “Enter” key on your keyboard. As a result, records matching the entered parameters will be displayed in the table.
To clear the entire search field and reset the filter, click the ![]() button. If you need to remove a single parameter, click the “X” located within the query field itself (Figure 2, Pointer 2).
button. If you need to remove a single parameter, click the “X” located within the query field itself (Figure 2, Pointer 2).
Search by Counters:
The page displays counters providing information by vehicle type and by the readiness status for vehicle loading (Figure 1, Pointer 2). Clicking on one of the counter items will automatically filter and display the corresponding vehicles. This offers a convenient way to quickly find and manage vehicle information.
On the left side of the page, there is a block showing the number of vehicles at each created warehouse (Figure 1, Pointer 3). Clicking on a warehouse name will display only the vehicles associated with that warehouse in the table.
If you click the ![]() button in this block, a window for adding a new warehouse will open (Figure 3). By clicking the
button in this block, a window for adding a new warehouse will open (Figure 3). By clicking the ![]() button, you will be redirected to the settings page, under the “Warehouses” tab, where you can edit previously created warehouses (see the “Warehouses” page description).
button, you will be redirected to the settings page, under the “Warehouses” tab, where you can edit previously created warehouses (see the “Warehouses” page description).
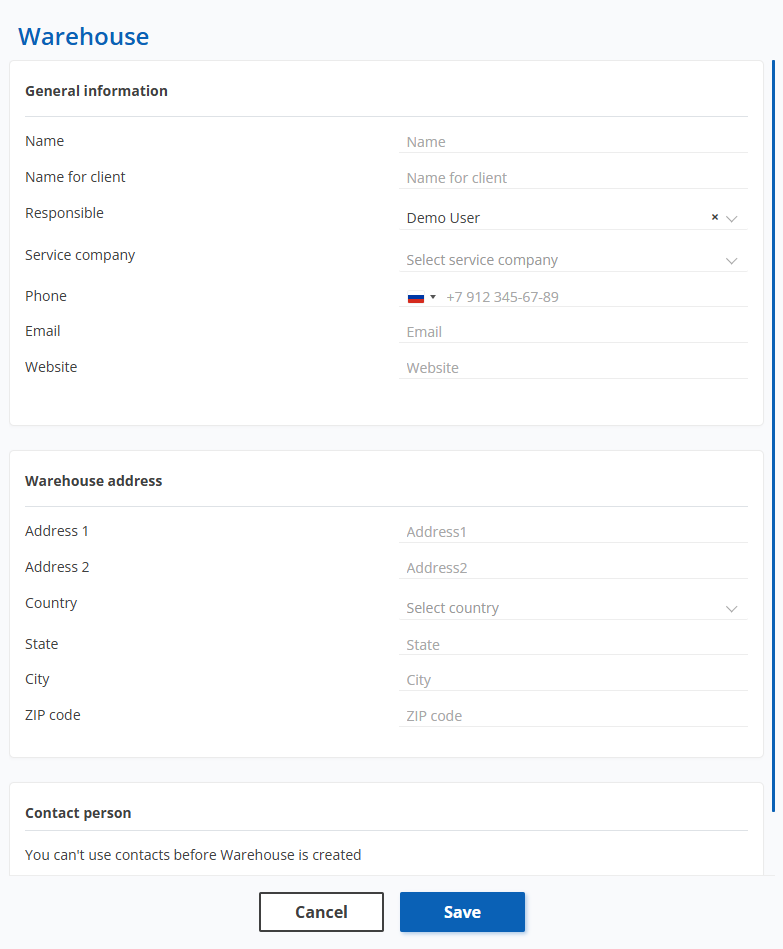
Figure 3 - “Warehouse” window
Vehicle Table
The table displays information about each vehicle. Below is a description of the main fields (Figure 1, Pointer 4):
-
“Photo”;
-
“Auto Type” – information about the type of vehicle;
-
“Engine Type” – information about the vehicle’s engine type;
-
“Make, Model, Year, VIN” – clicking on the VIN in the table (Figure 1, Pointer 5) will open the lot view page, which contains detailed information about the selected vehicle (see the description of “Lot View”);
-
“Warehouse” – displays the warehouse where the vehicle is located;
-
“Client” – clicking on the client’s name (Figure 1, Pointer 6) will open a window with full information about that client, where you can make necessary changes (see the description of the “Clients” page);
-
“Car Purchase Date” – the date the vehicle was purchased at auction;
-
“Date of Delivery to Warehouse” – the date the vehicle arrived at the warehouse;
-
“Ready for Loading Status” – status of the vehicle’s readiness for loading;
Note: If the vehicle is not in a ready status, clicking the icon will open a window offering to change the current stage. -
“Destination Country” – displays the country to which the vehicle must be delivered;
-
“Document Status” – information about the availability of the vehicle’s documents;
-
“Key Status” – information about the availability of the vehicle’s keys;
-
“Instructions for Formation” – a field for notes regarding nuances of loading or transporting the vehicle;
To create a new container, mark the checkboxes ![]() next to each vehicle in the table that you want to include in the container. At the top right of the table, a bar will appear showing information about the number of selected vehicles, classified by vehicle type and engine type. A warning will also appear if any of the selected vehicles contain hazardous cargo.
next to each vehicle in the table that you want to include in the container. At the top right of the table, a bar will appear showing information about the number of selected vehicles, classified by vehicle type and engine type. A warning will also appear if any of the selected vehicles contain hazardous cargo.
After that, click the “Create Container” button (Figure 1, Pointer 9) — the “Container” window will open (Figure 4), where you can create a container with the selected vehicles (see the “ Form a Containers” section description).
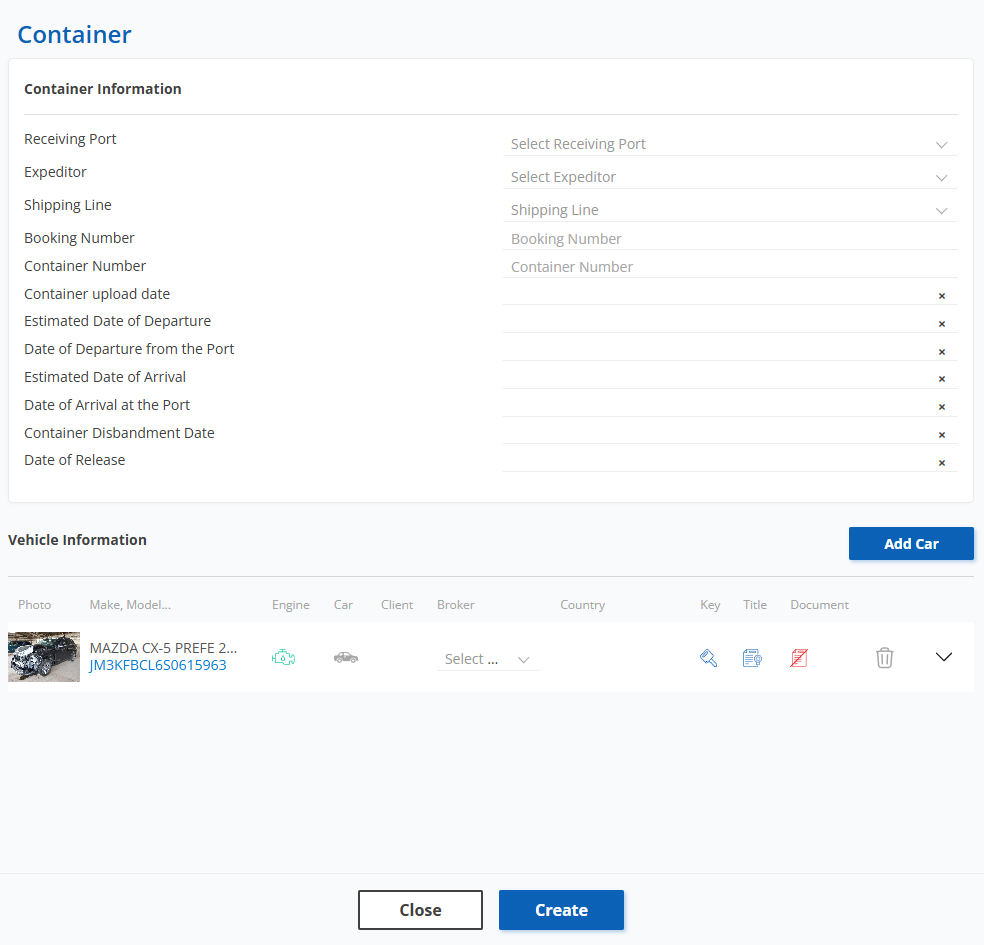
Figure 4 - “Container” window
To access the list of already created containers, click the “Formed Containers” button (Figure 1, Pointer 8). After that, you will be redirected to the “Containers” page, where you can view the containers that have already been created.